Uncategorized
How Do I Install an Under-sink Boiling Water Unit in Australia: Your 2026 Guide

Jun
You're usually asking this question at the exact point the kettle has started to annoy you. Bench space is tight, you want filtered boiling water on demand, and the idea of a neat under-sink unit sounds straightforward enough. Then you open the cabinet, see the trap, the power point, the hoses, the waste line, and realise this job is only simple if the planning is right.
That's the main difference with under-sink boiling systems in Australia. The tap on the benchtop is the visible part. The actual installation lives underneath, where plumbing compliance, electrical safety, drainage, pressure control and temperature settings all have to work together. If one part is off, the unit might leak, underperform, or leave you with a warranty or insurance problem later.
A capable DIYer can handle some parts of the prep and fit-off. But safe installation in an Australian kitchen means treating this as more than a tap swap. It needs the right clearances, the right fittings, the right pressure, and the right licensed trade where the law requires it.
Your Guide to Instant Boiling Water on Tap
An under-sink boiling water unit gives you speed, cleaner bench lines and one less appliance to drag out every day. For tea, cooking, baby bottles, a quick pasta top-up or a busy office kitchenette, it's one of those upgrades people use constantly once it's in.
The part many guides gloss over is that these units aren't forgiving of rough installation. They combine mains water, heat and electricity inside a cramped cabinet. That means small mistakes matter. A hose with too tight a bend, a benchtop that's too thick for the tap assembly, poor cabinet ventilation, or an overlooked pressure issue can turn a premium unit into a repeat service call.
Practical rule: If the cupboard layout looks crowded before the install, it won't get easier once the boiler, filter head, valves and tubing are inside.
The good news is that the process is manageable when you treat it like a sequence, not a guessing game. Start with the cabinet and services. Confirm the tap position. Check water supply and drainage. Make sure power is correct. Then connect, prime, heat and test.
That approach matters whether you're fitting a basic boiling-only setup or a more complex boiling and chilled system from brands such as Zip, Stiebel Eltron, Billi or Insinkerator. The parts vary, but the job logic stays the same. Good installs are tidy, accessible, pressure-controlled and easy to service later.
Pre-Installation Planning Your Under-Sink Space
A lot of bad installs look fine for the first week. Then the tap spits, the cabinet runs hot, the filter is impossible to change, or a high incoming pressure starts stressing fittings that were never set up properly. Most of that is decided before the unit is even unpacked.
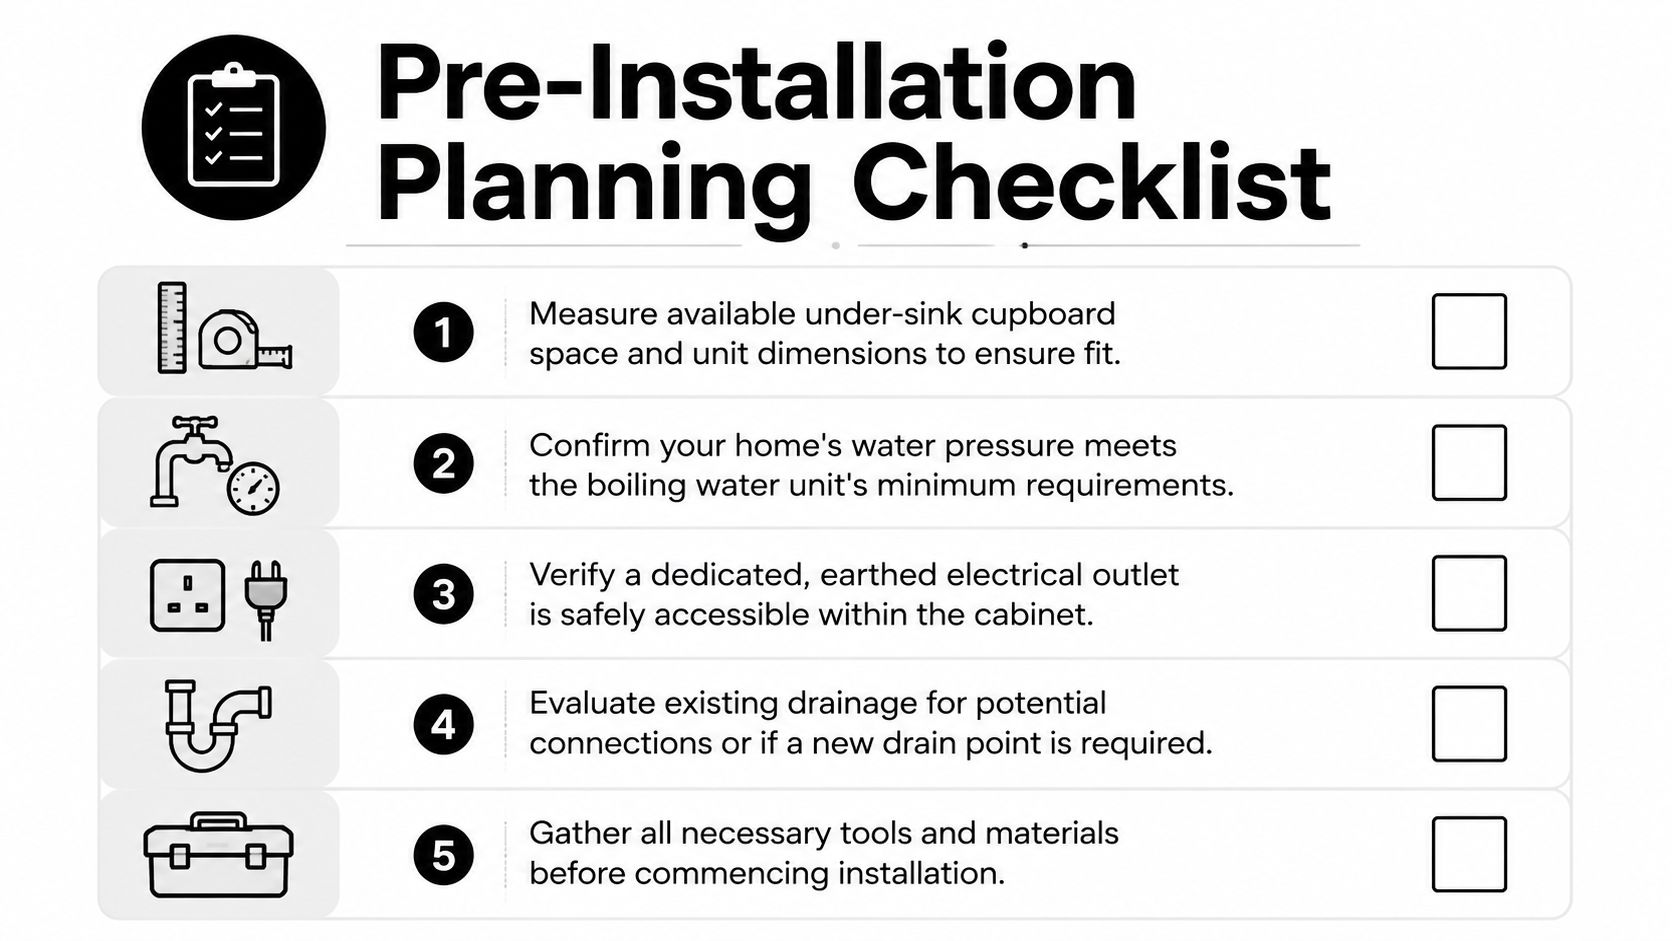
Measure the cupboard properly
Start with the usable space, not the cabinet's advertised size. In older Melbourne kitchens, the bowl waste, trap, door hinges, shelf edges and existing stop tap often take up more room than people expect.
Check for enough room to mount and service:
- The tank body with the clearances specified by the manufacturer
- Filter head and cartridge where fitted
- Tubing runs that stay smooth and untwisted
- Access to isolation valves and power
- Removal space for future filter changes or unit replacement
Ventilation matters as well. A boiling unit packed hard against cleaning bottles, bin caddies or stacked chemicals will be harder to cool, inspect and service.
Check the benchtop from above and below. Confirm the tap hole suits the tap shank, the fixing nut can be tightened properly, and the benchtop thickness is within the manufacturer's limit. Also confirm there is a suitable switched outlet in the cabinet and that its position keeps the plug and lead clear of any wet area.
Check the water feed and shut-off access
The cold feed should be easy to isolate, easy to reach and positioned so the tubing run stays neat. If the only connection point is buried behind the trap or pushed into the back corner, sort that out before install day.
A separate service valve saves time later. It also means you can isolate the unit without shutting down the whole kitchen. If you want to check whether the existing valve arrangement is serviceable, this guide to a kitchen shut-off valve under the sink covers what to look for.
Focus on three checks:
- Access. You should be able to shut the water off without emptying the entire cupboard.
- Condition. Older mini stops and combo valves often seize or weep once disturbed.
- Position. The outlet should allow a clean path to the filter and unit inlet without sharp bends.
Don't skip pressure assessment
This is the step many DIY guides underplay, and it matters more in Melbourne than in a lot of other areas. Plenty of homes see high mains pressure. A boiling water unit may still need lower and more stable pressure at the appliance or at the property entry, depending on the product and the rest of the plumbing setup.
Ring Hot Water notes in its guide to choosing an under-sink hot water system for an Australian kitchen that pressure reducing valves are often needed, particularly in higher-pressure Melbourne supplies. That lines up with what we see in the field. If pressure is left unchecked, the usual results are nuisance dripping, poor tap behaviour, shortened filter life and callbacks that could have been avoided.
Check the incoming pressure before you lock in the layout. If a PRV is required, plan where it will go and make sure the rest of the installation still complies with AS/NZS 3500. That includes accessibility, valve placement and using components suited to the pressure and temperature involved.
If you have not assessed the supply pressure, you have not finished planning the job.
Plan the drainage and safety path
Boiling units need a safe path for any discharge, venting arrangement or leak event specified by the manufacturer. They also need a cabinet layout that makes problems visible early.
Confirm these points before installation:
- Any required drain or tundish arrangement suits the unit instructions and local plumbing rules
- The cabinet base is sound, level and suitable for a tray if one is being fitted
- The power lead route stays clear of valves, waste fittings and possible drip points
- The tap position gives comfortable use at the sink without excessive splash-back
Neat work under a sink is not about appearance alone. It is about leaving enough room to isolate, inspect, test and service the unit safely. That is the difference between an install that lasts and one that turns into a maintenance headache.
Gathering Your Tools and Sourcing Genuine Parts
A clean install usually comes down to preparation. If you're halfway through and discover the tap hole is undersized, the tube insert is missing, or the supplied fitting doesn't suit the local valve arrangement, the job stalls fast.
I treat this stage like a pre-flight check. Put every tool and consumable on the floor first, then start.
Essential tools and parts for installation
| Item | Description | Professional Tip |
|---|---|---|
| Adjustable spanners | For tightening tap tails, nuts and compression fittings | Use two spanners where possible so you're not twisting connected pipework |
| Tube cutter | Makes clean square cuts on plastic tube or copper | A rough cut creates sealing problems, especially on push-fit connections |
| Drill and tap-hole saw | Needed if the benchtop doesn't already have a suitable opening | Check the manufacturer's tap-hole requirement before drilling stone or stainless |
| Screwdrivers | For mounting brackets, clamps and cover plates | Keep one insulated driver handy for cabinet work near power |
| Bucket and towels | For draining down and catching residual water | Put them in place before loosening any existing stop valve or hose |
| Isolation valve and tee fittings | Used to create a serviceable cold water feed | Choose fittings that leave enough space to turn and remove later |
| Filter head and cartridge | Required on many systems to protect the unit and improve water quality | Mount the head where the cartridge can drop out vertically for replacement |
| Food-grade tubing and inserts | Carries water from valve to filter to tank to tap | Never reuse old tube if it has set into a bend or shows whitening at stress points |
| Safe waste tray and leak device | Supports compliant under-sink protection | Fit these before crowding the cabinet with the unit itself |
Where parts choice matters
The temptation is to substitute whatever the local hardware aisle has on hand. That's where trouble starts. Boiling water systems use brand-specific cartridges, seals, heads and tap connection parts. A generic substitute may fit physically but still create leaks, flow issues or warranty arguments later.
For push-fit work and filter lines, plumbers often prefer known systems such as John Guest fittings paired with proper tube inserts. For threaded connections, brass parts with the right thread and sealing method are the safer call than mixed bargain-bin fittings.
If you need brand-matched consumables, Zip spare parts in Australia are one example of the kind of specialist stock that matters when you're replacing filters, valves or tap components rather than improvising.
Ring Hot Water also supplies genuine spare parts, filters, John Guest fittings and brass threaded parts for many of the units commonly installed in Australian kitchens. That matters most when you want the replacement part to match the original system without guesswork.
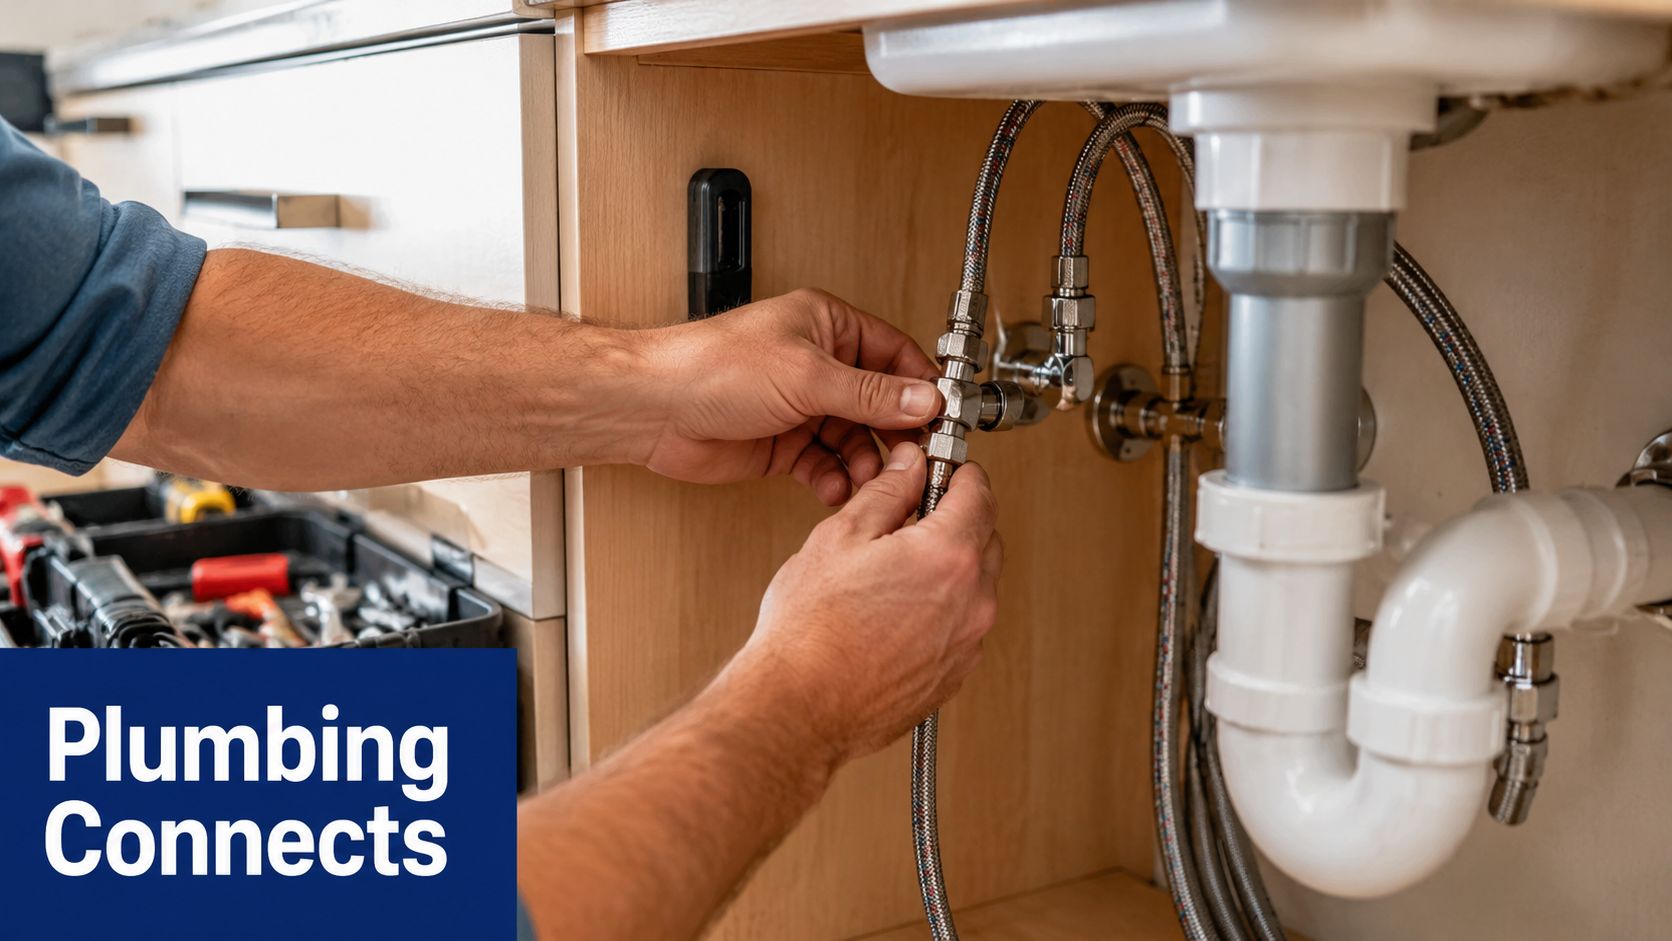
A Step-by-Step Plumbing Connection Guide
A tidy under-sink install usually stays out of trouble. A rushed one can drip into the cabinet for months, or cycle the relief line because the house pressure was never checked properly. In Melbourne, that second problem is common enough that I look at supply pressure before I trust any of the pipework layout.
Mount the tap before the cabinet gets crowded
Set the tap first while you still have clear access above and below the bench. If the benchtop needs a new hole, drill it to the manufacturer's size, dry-fit the tap, then confirm the handle or lever clears the splashback and sink edge through its full travel.
The base has to sit flat. On stone, a slight rock usually means the washer stack or mounting seat is wrong. On thinner stainless tops, add a stabilising plate if the tap flexes under hand pressure.
Check it now, not after the hoses are connected. Any twist in the body will load the tubing and fittings below.
Build the cold feed in the right order
Isolate the main supply, confirm the line is dead, then tee off the cold line for the unit. A clean sequence is:
- isolation valve on the appliance branch
- pressure control if required
- line to filter head
- line from filter to boiler inlet
- outlet line from boiler to tap
That pressure control step gets missed too often. In higher-pressure suburbs, fitting the correct pressure limiting valve for boiling water units can stop nuisance discharge, noisy operation and premature wear on cartridges, seals and internal valves. It also helps bring the install into line with the appliance instructions and AS/NZS 3500 requirements.
Run the tubing with intention. Keep it off sharp cabinet edges, hinge screws, trap arms and the underside of the sink bowl. Leave enough length to service the filter and tank, but not so much that the loops sag into the waste area.
Routing decides how reliable the install will be
Most call-backs I see are simple routing faults. Kinked tube behind the tank. Twisted line at the filter head. A hot outlet hose pushed hard against the cabinet wall until it flattens.
Watch for these trouble spots:
- Tight bends behind the tank that cannot be inspected later
- Tube memory at push-fit connections where the line is trying to spring away from the fitting
- Crossed lines that get pinched when the cupboard door closes
- Unsupported runs rubbing on metal sink bowls or raw timber edges
If a tube is fighting the route, change the route. For push-fit systems, use the proper inserts and make square cuts. For threaded joints, seal them the way the fitting type calls for instead of wrapping everything with tape and hoping for the best.
A short visual walkthrough can help if you want to compare your cabinet layout against a typical install sequence.
Fit the safety hardware, not just the water lines
Concealed under-sink units need protection around them, not just water connected to them. Where the product and local plumbing requirements call for a safe tray, leak shut-off device, tundish or discharge arrangement, fit those parts before the cabinet fills up.
Leaks under a sink are often slow and hidden. By the time the owner notices swollen melamine or a damp kickboard, the damage has already spread into the cabinet base and nearby joinery. A tray gives water a controlled path. A leak detection or shut-off device gives you a second chance before a minor seep becomes a cabinet replacement.
Ring Hot Water supplies genuine valves, fittings, filters and brand-matched parts for this part of the job, which saves guesswork when a unit needs to match existing components rather than being adapted with mixed hardware.
Connect relief and discharge correctly
If the unit has a relief or expansion outlet, connect it exactly as the manufacturer specifies. Do not cap it. Do not reduce it. Do not send it somewhere that cannot be inspected.
Before turning the water back on, check these points carefully:
- Tank fixed securely so the pipework is not carrying the weight
- All push-fit collets fully engaged and tubing inserted to depth
- Threaded joints tightened correctly for the material and fitting type
- Tray and leak device positioned properly before access disappears
- Service labels and isolation points visible for future maintenance
Australian plumbing rules and electrical safety rules overlap in this cupboard more than many DIY installers expect. For broader context on outlet protection in wet areas, it helps to understand AFCI and GFCI importance, then apply the Australian equivalent requirements through licensed electrical work where needed.
The neat installs are usually the safe installs. Good support, correct pressure control and clear discharge paths prevent most of the faults that show up later.
Navigating Electrical Safety and Compliance
Plumbing gets most of the attention because leaks are visible. Electrical mistakes are less forgiving. Under-sink boiling units draw real load, live in a damp environment and sit beside metal pipework, waste fittings and cabinet contents that were never designed to share space with ad hoc extension leads.
That's why the electrical side should be treated as licensed work, not a convenience task. If a new outlet is needed, or if the existing one isn't suitable, get an electrician involved.
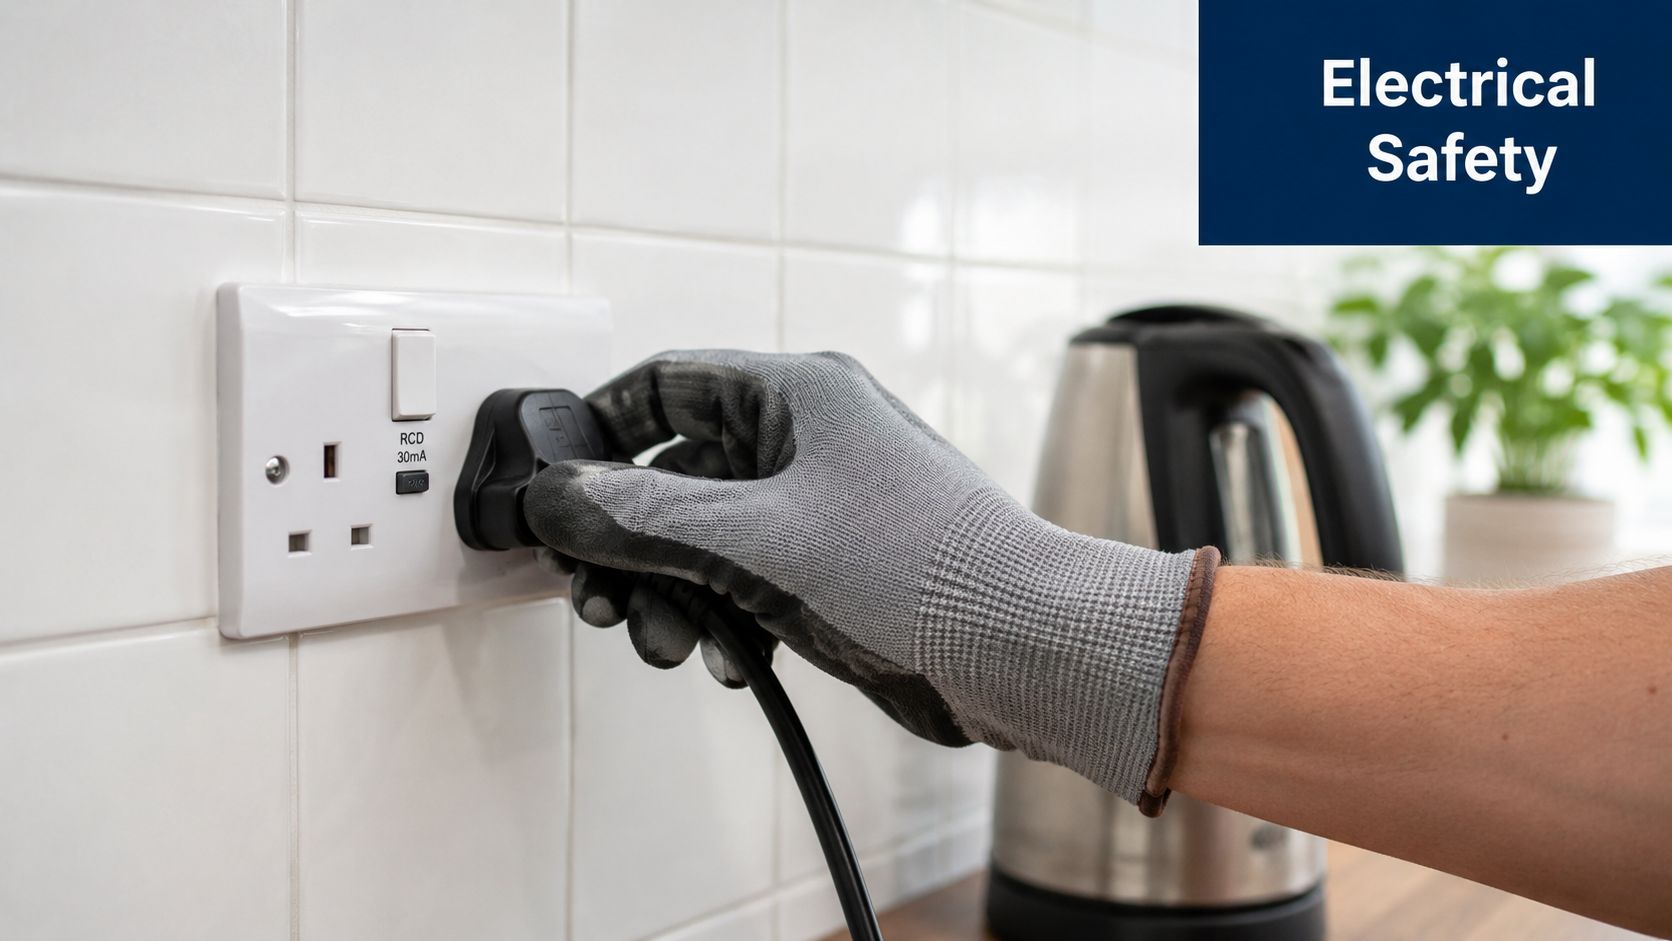
What the power supply needs to look like
For these systems, the under-sink outlet should be dedicated, switched and accessible. You don't want the plug hidden behind the tank with no way to isolate power quickly if there's a leak or service issue.
Avoid these shortcuts:
- Power boards in the cabinet. They add clutter and risk in a wet zone.
- Shared outlets with other appliances. That makes isolation messy and can create nuisance issues.
- Leads under tension. A stretched flex near plumbing isn't acceptable.
- Buried switches. If you can't reach the switch without moving the unit, servicing becomes harder than it should be.
If you're reviewing broader protective concepts around wet-area electrical safety, this overview on understand AFCI and GFCI importance gives useful context, even though Australian compliance is governed by local rules and licensed trade requirements.
Pressure control and electrical safety are related
People often separate plumbing from electrical as if they don't interact. Under a sink, they absolutely do. A pressure problem that leads to leakage can turn a safe electrical setup into a hazard zone. That's one reason the incoming water side has to be controlled properly before the unit is energised.
If you need a practical primer on pressure-control hardware itself, this overview of a pressure limiting valve for household water systems explains what the component does and where it fits into the broader installation picture.
Keep electricity and water physically separated in the cabinet layout. Don't let tubing cross over plugs, switches or flex cords if a cleaner route exists.
Temperature setting is a safety setting
Boiling water systems are sold for convenience, but hot water injuries are the reason Australian settings matter so much. The Victorian Building Authority advises that over 90 small children and vulnerable adults suffer severe burns each year from unregulated hot water temperatures in Australia, and notes that AS/NZS 3500.4.2 requires under-sink boilers to be installed with temperature controls limiting output to 55°C.
That's why installers don't treat thermostat setup as an afterthought. It's a core safety setting. Many major brands adopted that benchmark because it balances practical use with reduced scald risk.
When to stop DIY work
A capable homeowner can inspect the cabinet, prepare the space, shut off water and even assemble some non-licensed components. But new electrical work, doubtful outlet conditions, damaged cords, or any uncertainty around cabinet moisture should end the DIY part of the job.
Call an electrician if:
- There's no suitable switched outlet
- The outlet sits where it may be exposed to leakage
- The plug top or flex is damaged
- The circuit arrangement is unknown
- You're tempted to “just use a power board for now”
That last one is the shortcut that often starts with convenience and ends with a fault call.
Commissioning and Testing Your New Unit
A lot of first-day callouts come down to commissioning, not a defective unit. The tank must be full before any heating starts, and the tap needs a proper test under normal operating conditions, not just a quick glance inside the cupboard.
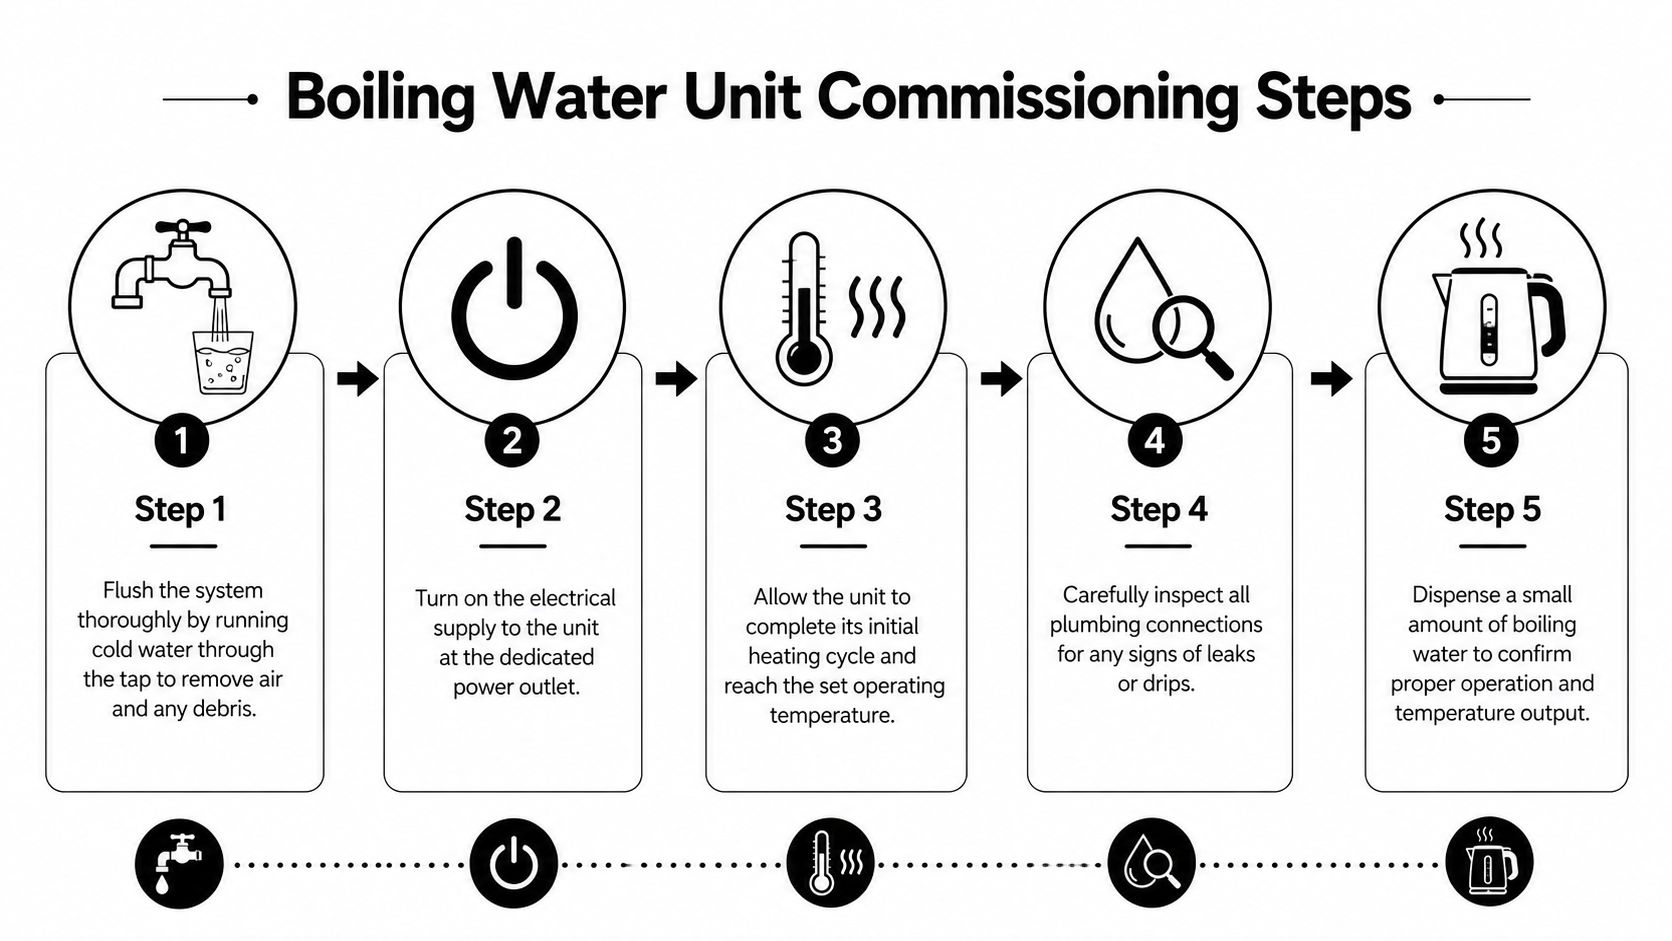
Prime first, then power up
Start with water only. Open the isolation valve, let the tank fill, and run the tap until air clears from the line and flow is steady. Only then should the unit be switched on.
That order protects the heating element. Powering an under-sink boiler before it is fully charged with water is one of the fastest ways to damage a new unit. It also creates confusion later, because the symptoms can look like a manufacturing fault when the actual issue is dry firing during start-up.
Give the unit time to do its first heat-up cycle. Depending on the model, that can take several minutes. During that period, watch the flow, listen for repeated refill behaviour, and pay attention to pressure. In Melbourne homes with higher mains pressure, a unit without the right PRV setting can spit, drip, or cycle more than it should once the water starts expanding with heat.
Run a proper leak and function check
Check every connection slowly and with good light. Look behind the tank, around the filter head, at the inlet connection, and anywhere tubing passes a cabinet edge. I use a dry tissue or finger on each fitting because a tiny weep often shows up there before it reaches the cabinet floor.
Use a commissioning checklist:
- Touch-test each fitting for any sign of moisture
- Inspect the cabinet floor and tray after the unit has filled and heated
- Confirm the filter flush procedure if the manufacturer specifies one
- Dispense water carefully and verify smooth tap operation
- Listen for hammering, hiss, or constant refill cycling
- Check pressure behaviour if the tap drips or the relief path shows repeated discharge
A dry cabinet after five minutes isn't enough. Recheck after the unit has heated, then again after the tap has been used several times.
If the unit shows odd behaviour at this stage, look at pressure control before blaming the appliance. Under-sink boiling units are sensitive to supply pressure, and AS/NZS 3500 compliance is only part of the story. The installation also has to work reliably in a real cabinet, on a real Melbourne water main. Ring Hot Water sees this regularly with replacement jobs where the original install skipped pressure reduction or used the wrong valve setting.
Final handover checks
Finish with the practical stuff. The power switch should be accessible, the isolation valve easy to identify, and the filter change path clear enough that the next service does not turn into a cabinet strip-out.
A neat install is easier to maintain and easier to trust. If a user cannot isolate it quickly, or a technician has to bend tubing out of the way just to change a filter, the commissioning was only half done.
Installation FAQs and When to Call a Pro
Can I legally install an under-sink boiling water unit myself in Australia
Some preparation and fit-off tasks may be within the ability of a capable DIYer, but plumbing and electrical rules vary by state and by the type of work involved. Once you're altering fixed plumbing, adding valves, or dealing with new electrical supply, licensed trades are often the right and legally required path.
The safest approach is simple. If the job involves permanent plumbing changes or any new electrical work, treat it as licensed work.
What usually goes wrong on first installs
Most problems aren't exotic. They're layout and sequencing errors. The common ones are poor tube routing, inaccessible valves, no pressure control where it's needed, forgotten leak protection, and powering the unit before it has filled properly.
If the unit leaks, cycles strangely, or won't deliver proper flow after installation, stop using it until the cause is clear.
Why is my new tap dripping or making noise
A drip can point to pressure issues, an incorrectly seated fitting, a relief line behaviour that needs checking, or debris caught during installation. Noises can come from air still in the system, pressure fluctuations, or a poor cabinet layout that lets tubing or fittings vibrate against surfaces.
Start with the basics:
- Check visible joints for moisture
- Confirm the unit was commissioned fully
- Make sure tubing isn't kinked or under strain
- Verify the cabinet isn't forcing lines hard against the tank
If the symptom continues, that's the point to call a technician rather than chasing it blindly.
How often should the filter be changed
Follow the unit manufacturer's replacement guidance for the specific cartridge fitted to your system. Filter timing depends on the brand, local water quality and usage pattern. In harder-water or higher-use kitchens, filters can lose performance sooner.
If taste changes, flow drops, or the unit indicates service is due, don't leave it for later.
When is professional installation worth it
Professional installation is worth it when the cabinet is tight, the pressure is unknown, the waste path needs thought, the power setup isn't ideal, or you want the installation documented and compliant from the start. That applies even more in older Melbourne homes where under-sink layouts are often awkward.
Call a pro if any of these are true:
- You don't know your mains pressure
- The sink cabinet has limited access
- A new outlet or electrical change is required
- You want leak protection and tray setup done properly
- The unit is premium enough that warranty risk isn't worth the shortcut
A boiling water tap should feel effortless once installed. It shouldn't become an ongoing cabinet project because one critical step was skipped.
If you want help with the parts, compliance questions or a full install, Ring Hot Water supplies under-sink boiling and chilled water systems, genuine spare parts and Melbourne-based installation support for a wide range of brands.
