Uncategorized
Insinkerator Hot Water Tap Problems: DIY Fixes
Jun
You go to make the first tea of the day, reach for the InSinkErator lever, and instead of that quick stream you rely on, you get a dribble, a spit of air, or nothing at all. That's usually when people crouch in front of the sink in their slippers, wondering whether this is a simple blockage or the start of an expensive repair.
Most InSinkErator hot water tap problems sit in one of two camps. There's the safe DIY camp, where a careful homeowner can check isolation valves, straighten a kinked hose, inspect for an obvious leak, or rule out a blocked outlet. Then there's the professional camp, where electricity, internal tank parts, persistent leaks, or damaged components mean it's time to stop and call someone who works on these systems every day.
A good fault-finding process saves time and prevents the common mistake of replacing the wrong part. Calm, methodical checks usually tell you whether you're dealing with poor flow, no heat, a dripping tap, or a tank-side issue hiding under the bench.
That Morning Cuppa Interrupted
The call often starts the same way. “The tap was fine yesterday. This morning it's barely running.” Or, “It's making the usual noise, but the water's only warm.” Sometimes it's more urgent. “There's water in the cupboard and I don't know what I'm looking at.”
That's the thing about instant hot water taps. They become part of the routine. Tea, coffee, porridge, washing a pan, filling a pot. You don't notice how often you use one until it stops behaving.
With InSinkErator hot water tap problems, the symptom matters more than the guess. A lukewarm flow points you in a different direction from a sputtering outlet. A leak at the spout means something very different from moisture around the tank body. If you start by naming the symptom properly, you avoid chasing the wrong fix.
Start with what changed
Think about what the tap is doing right now, not what you think has failed.
- No water at all usually means no supply to the unit, a blockage, or an isolation issue.
- Water but no heat usually shifts suspicion to the tank side rather than the faucet body.
- Dripping or weeping can come from seals, pressure-related behaviour, or a worn connection.
- Sputtering and weak flow often point to restriction, trapped air, or an installation issue.
A lot of under-sink hot water faults sound dramatic but start with something simple, like a partly closed valve or a line that's been knocked while storing cleaning products.
The main goal at the start is to separate the safe checks from the risky ones. If you can do that, you'll know whether this is a ten-minute look under the sink or a job that shouldn't go any further without proper tools and training.
Essential Safety Checks Before You Start
Before you touch a hose, fitting, or cover, isolate the system properly. These units combine water, heat, and electricity in a cramped cupboard. That's manageable when you respect the risks. It's not manageable when you rush.
The first job is power. Turn off the circuit that feeds the under-sink outlet. If you're not completely sure which circuit it is, isolate the main power before you go further. Then close the small water isolation valves feeding the unit. Turn them fully clockwise so you're not relying on a half-closed valve.
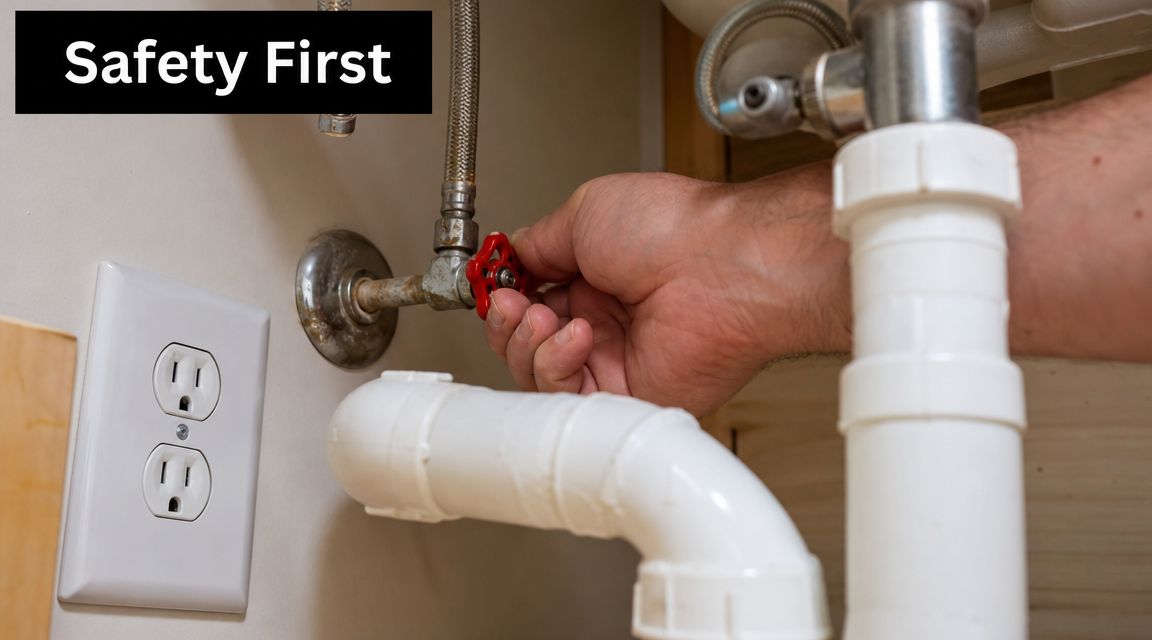
The non-negotiable shutdown sequence
Use this order every time:
- Turn off electrical power at the switchboard first.
- Close the water isolating valves under the sink.
- Check for stored heat by assuming all metal parts and nearby pipework may still be hot.
- Open the cupboard slowly if there's evidence of leaking, so you don't disturb a hose that's already under strain.
If water is already escaping fast, your priority is stopping flow, not diagnosis. In a full plumbing emergency, broad guidance like Restore Heroes burst pipe help is useful for understanding immediate containment steps before a local licensed technician takes over.
Why this matters on older units
The strongest historical safety signal for this style of system is a U.S. recall covering about 252,000 units sold from January 1972 through December 1996, after the manufacturer received three reports of holes in electrical insulation or the outer cover. One incident caused a kitchen fire with nearly US$7,000 in property damage, according to the CPSC recall notice for instant hot water dispensers. That recall isn't an Australian recall notice, but it's still relevant because older Australian installations often use the same tank-and-faucet layout and the same kinds of age-related failure points.
Practical rule: If you see brittle wiring, a scorched plug top, a cracked tank cover, corrosion around electrical entries, or signs of heat damage, stop there.
For the water side, it helps to know exactly where your shut-off points are before anything goes wrong. If you're not sure what you're looking at under the sink, this guide to a hot water shut-off valve gives a plain-language overview of the valve's role and where homeowners usually find it.
Safe DIY line in the sand
You can safely do visual checks, valve checks, and simple access checks after isolation. You should not work live, dismantle electrical covers casually, or keep “just testing it” when there's evidence of heat damage or active leaking. That's the point where a simple tap problem becomes a safety job.
Diagnosing Common Insinkerator Tap Problems
Once the system is isolated and the area is safe, diagnose by symptom. Don't jump straight to parts. A systematic check tells you whether the fault sits in the faucet, the feed, the tank, or the installation itself.
Troubleshooting cheat sheet
| Symptom | Likely Cause | First DIY Check |
|---|---|---|
| No water at tap | Closed isolation valve, kinked hose, blockage | Confirm valves are open and hoses aren't trapped or bent |
| Water flows but isn't hot | Tank not heating, thermostat issue, element issue | Confirm power supply is available and look for obvious tank-side faults |
| Dripping tap | Worn seal, debris in faucet, pressure-related issue | Check whether the drip is from the spout, handle area, or a fitting below |
| Sputtering or weak flow | Restriction, trapped air, pressure issue, poor layout | Check feed hose condition and whether the run under the sink is awkward or overly long |
| Leak in cupboard | Loose fitting, failed hose, tank leak | Dry the area and identify the highest wet point before touching anything |
No water coming out
If nothing comes out at all, start with supply and access. Under many sinks, someone has stored sprays, bins, or spare bottles in a way that presses against the small plastic or braided lines. A flattened or sharply bent hose can stop flow cold.
Then check the easy mechanical causes:
- Isolation valves may be closed or only partly open.
- Flexible lines may be kinked behind the tank.
- The faucet outlet may be restricted by debris or scale.
- The tank inlet fitting may be blocked.
A useful benchmark from InSinkErator's own fault-finding guidance is the relationship between faucet flow and inlet blockage. The guide says the system needs a minimum water pressure of 30 PSI and a maximum tank-to-faucet distance of 16 inches. It also notes that if you isolate the faucet and disconnect the blue inlet line, a weak hot-side flow points to a faucet obstruction, while a strong flow points to a tank inlet-fitting blockage, according to the InSinkErator troubleshooting guide.
That matters in Australian kitchens because cabinet layouts are often tight. I've seen plenty of installations where the tank has been pushed too far from the faucet just to make room for cleaning products or a pull-out bin. The unit then behaves like it has a fault when the underlying issue is layout.
If the tank is tucked hard into one side of the cupboard with a long looping hose run to the tap, don't assume the tank has failed. Check the installation geometry first.
Water flows but it isn't hot
Homeowners should take note: If water comes through normally but never heats, the problem usually sits on the tank side rather than in the tap body. That can mean power supply, thermostat, internal wiring, or the heating element.
Safe DIY checks are limited here:
- Confirm the outlet has power once it's safe to restore power for testing.
- Check whether the plug is secure and the socket isn't damaged.
- Look for a tripped breaker.
- Inspect the exterior of the tank for scorching, cracks, or moisture.
What doesn't work is guessing. Replacing random external fittings won't fix a dead heating circuit. Neither will running the tap repeatedly in the hope it “comes good”. If the issue is internal, repeated operation only wastes time and can add risk.
For broader background on tank-side hot water faults, a plain-language resource like EZ Plumbing's hot water heater guide can help homeowners understand the difference between supply problems, thermostat faults, and heater failures before they book service.
Dripping or leaking
Not all drips mean the same thing. A drip from the spout tip is one thing. Water creeping from the base of the faucet, from a handle joint, or from below the bench is another.
Work from top to bottom:
At the tap itself
Dry the faucet completely, then use it briefly and watch the first place water appears. If it shows at the base of the spout, suspect worn seals or O-rings in the rotating spout assembly. If it appears around the handle area, the fault may sit in the cartridge or internal faucet seals.
At the hoses and fittings
Dry every connection under the sink with a cloth. Then place a dry paper towel around each fitting one at a time. The first damp spot tells you more than a general wet cupboard ever will.
At the tank body
If moisture appears from the body of the tank rather than from a hose connection, stop. That's not a homeowner tightening job. A tank seam, casing, or internal seal problem needs proper assessment.
Sputtering, weak flow, or irregular delivery
This symptom frustrates people because it feels intermittent. One cup is fine. The next spits air and splashes the bench.
Common DIY-safe checks include:
- Look for trapped or twisted line sets under the sink.
- Make sure stored items aren't pressing on tubing.
- Check whether recent plumbing work elsewhere in the home has disturbed pressure or introduced debris.
- Inspect the faucet outlet for scale or visible residue.
This is also where installation limits matter. If incoming pressure is below the minimum noted earlier, or the tank sits farther from the faucet than the manufacturer allows, the tap can sputter, drip, or deliver weakly without any failed part at all.
What works and what doesn't
What works is narrowing the fault before buying anything. What doesn't work is changing filters, hoses, or even the whole faucet because “it seemed most likely”.
A good diagnostic order is simple:
- Safety isolation
- Visual leak check
- Valve and hose check
- Symptom-specific testing
- Decision on DIY versus professional repair
If you can't confidently say where the fault sits after those steps, that uncertainty is your answer. It's time to stop before a small tap issue turns into a damaged cupboard, a burnt-out part, or a live electrical risk.
Key Parts to Inspect and Potentially Replace
Some parts are service items. Others sit on the edge of what a careful homeowner should touch. The trick is knowing which is which.
The parts most often involved
Start with the components you can inspect without dismantling the tank.
- Filter or inlet-side restriction. If your setup includes filtration, reduced flow often starts there. A neglected filter can mimic a failing tap.
- Flexible hoses. Look for flattening, stress at the ends, rubbing against cabinet edges, or white mineral traces around fittings.
- Tap seals and O-rings. These are common culprits when the faucet leaks from the spout base or around moving joints.
- Isolation valves. A sticky or half-failed valve can reduce delivery and send you chasing the wrong problem.
Then there are the tank-side parts that need more caution.
Thermostat and element
The thermostat tells the system when to heat. The heating element does the actual work. When the tap flows but stays cold, these parts move high on the suspect list.
That said, it's often the case that DIY confidence outruns DIY skill. Testing and replacing electrical heating parts in a water appliance isn't the same as tightening a compression nut. If you need a plain-language overview of element fault-finding, this guide on how to test a hot water element is a useful reference before deciding whether the job is within your comfort zone.
If a repair requires you to prove whether a thermostat is switching correctly or whether an element has failed, you're already close to the point where a licensed technician makes more sense than trial and error.
A practical look under the sink helps here:
What a homeowner can usually do
A homeowner can usually handle:
- Visual inspection of hoses, valves, and obvious seepage
- Checking for kinks or crushed tubing
- Replacing accessible service items if the manufacturer's method is clear
- Confirming whether a leak is at a fitting or from the tank body
A homeowner generally shouldn't handle:
- Internal electrical diagnosis
- Opening a tank without confidence in the procedure
- Working on heat-damaged components
- Any repair where the leak source isn't clear
If you do need replacement parts, use parts that match the model and the exact fault. Generic guessing causes a lot of repeat failures.
Preventative Maintenance to Extend Your Tap's Life
Most InSinkErator hot water tap problems don't arrive out of nowhere. The system usually gives small warnings first. Slightly reduced flow. A small drip after use. A hose that looks a bit twisted. A cupboard that smells warm when it shouldn't.
Preventative maintenance isn't glamorous, but it's what keeps a minor service job from becoming a bench-full of wet chipboard.
Small checks that save bigger repairs
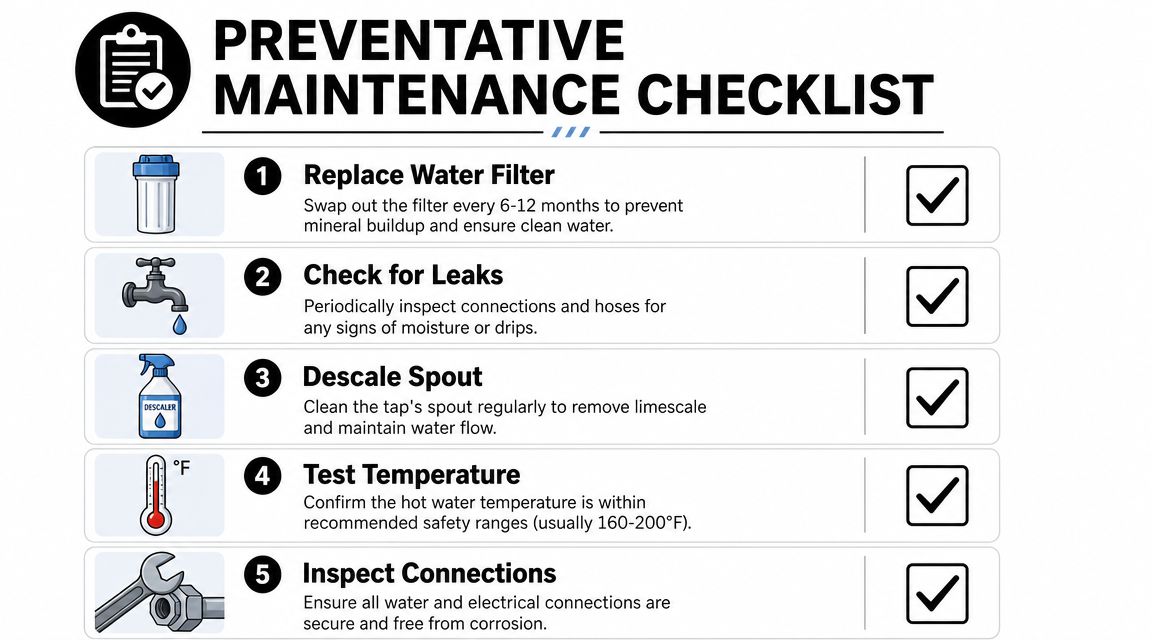
A simple maintenance rhythm makes these taps far more predictable:
- Replace the water filter if your setup uses one and it's due. Restricted filtration is a common cause of poor performance.
- Check for leaks around every visible fitting, especially after moving stored items in the cupboard.
- Clean the spout outlet if you notice splash, spray, or uneven stream shape.
- Monitor temperature consistency. Sudden changes usually mean something has shifted.
- Inspect connections for corrosion, stress, or movement.
Why prevention beats repair
Under-sink systems live in a harsh little environment. Steam, cleaning chemicals, vibration from cupboard doors, and constant reaching around them all add wear. A line that was sitting perfectly straight when installed can end up kinked months later because someone crammed a detergent bottle beside it.
That's why maintenance works best when it's practical rather than technical. You're not trying to overhaul the unit. You're catching obvious changes early.
A five-minute check under the sink is often enough to spot the beginning of a leak long before the cupboard floor swells or the socket gets wet.
Focus on the signs people ignore
The signs worth acting on are usually small:
- A fitting that needs frequent tightening
- A tap that starts spitting more often
- A faint stain or chalky trace on a hose
- A warm, damp patch inside the cupboard
- A change in normal operating sound
Those aren't reasons to panic. They're reasons to inspect while the issue is still contained.
There's also a parts decision here. If you're replacing consumables or visible fittings, use compatible components and install them carefully. If the problem keeps returning after a sensible maintenance step, it probably wasn't a maintenance issue at all. That's when diagnosis matters more than another replacement.
When to Call a Professional from Ring Hot Water
The DIY boundary is straightforward. If the job stays on the outside of the system, with visual checks, valves, accessible hoses, and obvious faucet-side symptoms, a careful homeowner can often narrow the fault safely. Once the job moves into electrical testing, internal tank components, unexplained heat issues, or leaks from the tank body, the sensible move is to call a professional.
The red flags that should stop DIY
Stop and book service if you notice any of the following:
- The tap flows but never heats, and basic power checks don't explain it
- Water is leaking from the tank body, not just from a fitting
- You see damaged insulation, scorching, or melted plastic
- A fitting continues to leak after a careful retighten
- The cupboard outlet or plug area has been wet
- Corrosion is visible on important components
- You're not confident identifying the failed part
That's not being overcautious. It's how you avoid turning a manageable repair into electrical damage, cabinet damage, or a replacement that wasn't needed.
Where professional diagnosis earns its keep
A trained technician doesn't just swap parts. They separate symptom from cause. That matters on these systems because weak flow can be installation-related, a drip can originate above where you first see it, and a no-heat complaint can come from several different faults that look the same to the homeowner.
If your issue has moved beyond the safe checks above, a specialist service for InSinkErator hot water tap repairs and replacement support is the practical next step. That's especially true when the unit is older, the installation is cramped, or previous repair attempts have already muddied the picture.
The goal isn't to discourage DIY. It's to keep it in the zone where DIY works. Good homeowners save themselves time and money when they isolate safely, observe carefully, and stop at the right point.
If your InSinkErator tap is dripping, sputtering, running cold, or leaking under the sink, Ring Hot Water can help you work out whether it's a simple service item or a repair that needs a technician. For Melbourne homes, offices, and trade customers, the team handles diagnosis, spare parts, repairs, and replacement advice for instant hot water systems without the guesswork.
