
Water Filters
Water Quality Testing

Jul
Water Quality Testing in Australia: Your 2026 Guide
You turn on the kitchen tap, fill a glass, and pause. The water looks a bit cloudy. Or maybe it tastes metallic in an older Melbourne home, smells like chlorine in the office kitchenette, or comes from a rainwater tank you've always assumed was fine because nobody's been sick.
That's usually when water quality testing stops being an abstract idea and becomes something you want sorted properly.
What's unnecessary is a chemistry lesson. What is needed is a practical way to decide whether a simple strip test is enough, when a proper lab test is worth the money, and what the result means for their home, workplace, appliances, and peace of mind.
Is Your Water As Clean As You Think
A lot of concern starts with something small. A kettle scales up faster than expected. The tea tastes flat. The bathroom tap leaves a chalky residue. Someone moves into an older suburb and wonders what the internal pipework has been doing for the last few decades. An office manager gets complaints that the cooler water tastes “off”, but only from one outlet.
Those concerns are reasonable. Water can be safe in one sense and still be unpleasant, hard on appliances, or unsuitable for a particular use. It can also look normal and still need closer checking. That's why I tell people not to wait for a dramatic sign. If your water has changed, or if you don't really know its history, testing is the quickest way to stop guessing.
The common triggers I see
In Melbourne homes and offices, the questions usually fall into a few familiar patterns:
- Taste changed: Metallic, bitter, earthy, or strongly chlorinated water often pushes people to investigate.
- Appearance changed: Cloudiness, staining, or sediment in a glass tells you something has shifted, even if the cause is simple.
- Appliance problems: Scale in kettles, boiling taps, espresso gear, and hot water units often points to mineral issues. If that's your main frustration, this guide to water filtration for hard water is a useful companion.
- Source uncertainty: Tank water, bore water, or mixed supply arrangements need a different mindset from straight mains water.
- Building age: Older homes and older commercial fit-outs raise more questions about internal plumbing, dead legs, and outlet-specific issues.
Practical rule: If the problem appears at one tap only, test that outlet. If it appears throughout the property, test closer to the point where water enters the building as well.
There's also a broader Australian reality behind these household worries. Over 500 remote communities lack consistent water quality testing, and an audit found more than 400 regional communities lack access to good-quality drinking water, which is one reason residents often need to be proactive about checking their own supply, especially outside major metro systems (research on remote and regional Australian water access).
Why reassurance should come from evidence
People often talk themselves out of testing because the water has “probably always been like that”. Sometimes that's true. Sometimes it isn't. Plumbing changes, tank maintenance, storms, roof debris, pipe corrosion, and outlet-specific contamination can all alter what comes out of the tap.
Good testing replaces vague concern with a decision. Keep using the water as normal. Add a simple filter. Retest after maintenance. Or escalate to a proper laboratory analysis because the issue isn't one for guesswork.
That's the value. Not panic. Clarity.
Choosing Your Water Quality Test Type
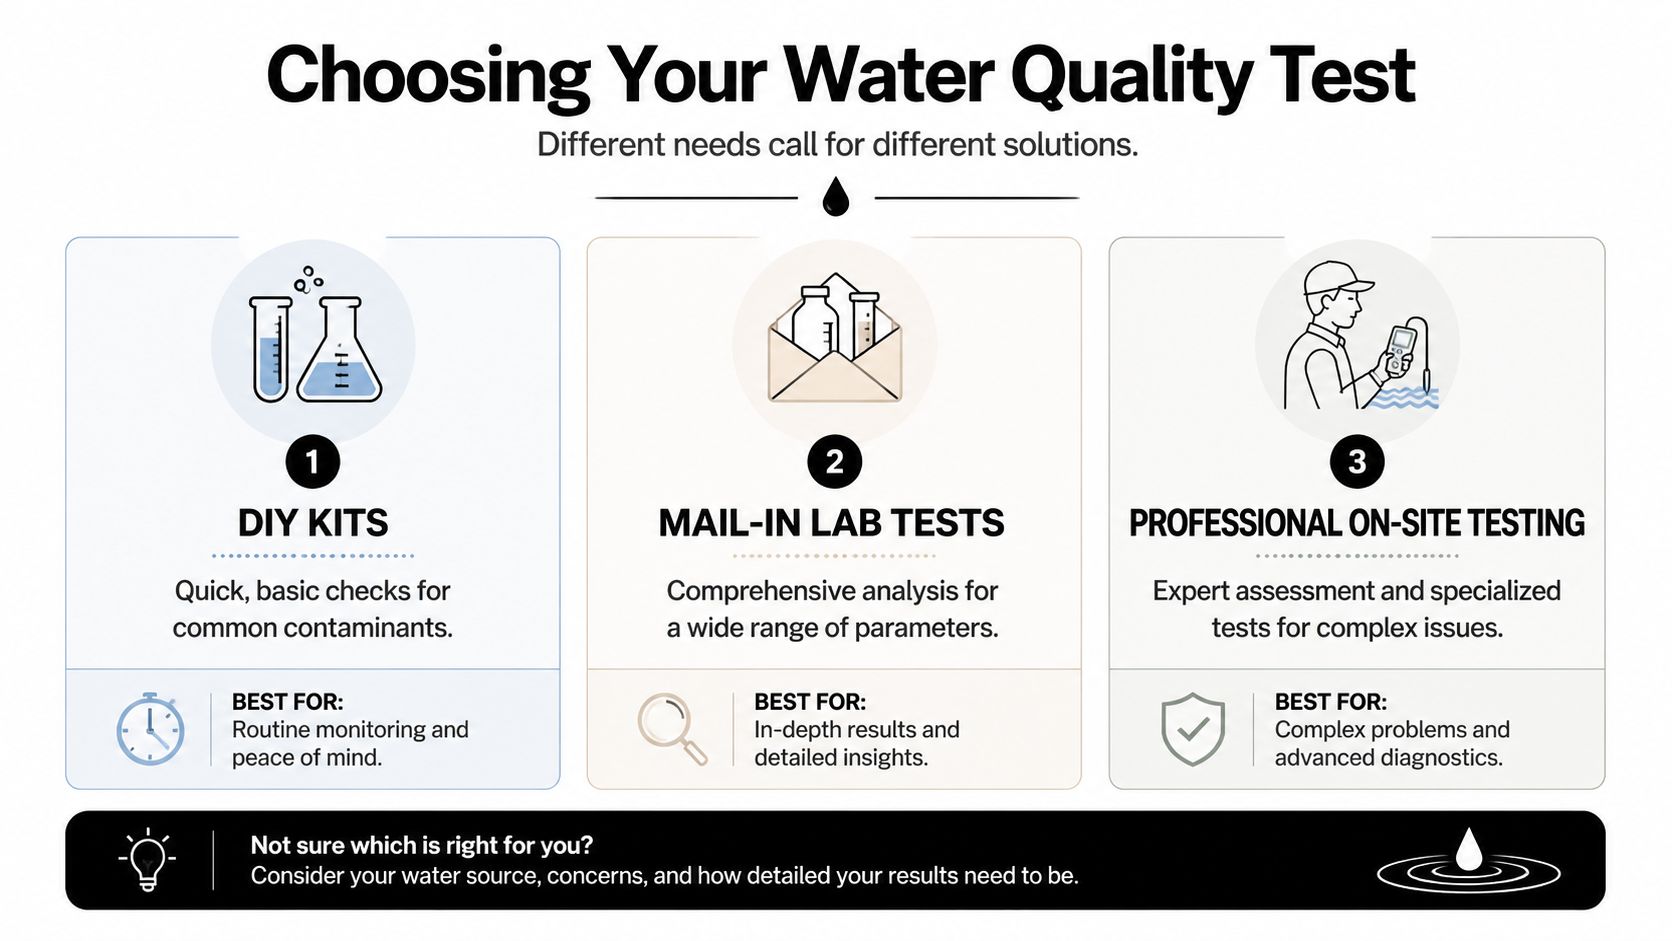
The easiest way to choose a test is to stop thinking about brands first and think about what kind of problem you're trying to confirm. Most water quality testing sits in three buckets: microbial, chemical, and physical.
If you choose the wrong bucket, you can spend money and still miss the actual issue.
Start with the risk, not the kit
Microbial testing is about living contamination. This matters most for tank water, private supplies, low-use outlets, and any system where water may sit for long periods. If your concern is bacteria, a hardness strip won't help.
Chemical testing looks at substances dissolved in the water. This is the category people should think about for metals, treatment residuals, or contaminants that don't change the water's appearance.
Physical testing is often where the day-to-day frustrations sit. Think cloudiness, sediment, hardness, and the characteristics that affect taste, staining, or limescale.
A simple decision framework
Use the water source and the symptom together.
Mains water in a metro home
If you're in a Melbourne apartment or suburban house on mains water and the main complaint is taste, smell, or scale, start with physical and basic chemical screening. pH, hardness, chlorine, and sediment-related issues are often the first places to look.
If the building is older, or the issue appears after the water has travelled through your internal plumbing, broaden the scope to include metals. In older suburbs such as Yarraville or Footscray, that's a sensible precaution when the water tastes metallic or only one tap seems problematic.
Tank water at home or work
Tank water needs more caution. Tank water should be tested at least every 5 years, and current guidance often doesn't give homeowners much practical direction on emerging contaminants such as PFAS, which is why residents often need to choose a broader test panel deliberately rather than rely on assumptions (Australian tank water testing guidance).
For tank systems, I'd prioritise:
- Microbial checks: Especially if the tank services drinking water.
- Physical checks: Sediment and turbidity matter because they affect both water quality and filtration performance.
- Selected chemical checks: Particularly if there's nearby industry, agricultural activity, or runoff concerns.
If you want a broader primer on essential water quality testing methods and how different approaches fit different water risks, that resource is worth reading alongside this decision process.
What works well in practice
A lot of people over-test low-risk situations and under-test high-risk ones.
What usually works is this:
- Test for the complaint first. If the issue is scale, check hardness. If it's a tank, don't skip microbial testing.
- Add one layer deeper if the site has a reason for concern. Older plumbing, unusual taste, nearby runoff, or vulnerable users all justify a broader panel.
- Match the test to the consequence. If the result could lead to pipe replacement, system disinfection, or filtration design, basic screening isn't enough.
Don't test randomly. Test with a reason. The best result is one that tells you what to do next.
DIY Kits vs Professional Lab Analysis
This common challenge often leaves many people uncertain: they wish to avoid overspending, yet they also seek to avoid false confidence from a cheap kit that merely scratches the surface.
Both options have a place. The trick is knowing what each one is good at.
Where DIY kits are useful
DIY kits are good for screening. They're quick, simple, and perfectly reasonable when you want an initial read on common issues such as pH, chlorine, or hardness. If your main goal is to understand why the kettle is scaling up or whether chlorine is affecting taste, a home kit can point you in the right direction.
A handheld meter can also be useful for routine spot checks. For example, a compact mini pH water tester meter is practical when you want a basic field reading without sending every sample to a lab.
DIY kits are less useful when the result has serious health implications or when you need defensible accuracy. That's the line many homeowners miss.
Where lab analysis earns its cost
If you're checking for bacteria, metals, or a wider contaminant profile, lab testing is the safer choice. It's also the right move when the water source is a tank, private supply, or an outlet serving staff, customers, tenants, or family members who rely on you to get it right.
The strength of lab analysis isn't just better sensitivity. It's also process control, chain of handling, and reporting quality. If you work in facilities, hospitality, or compliance-heavy environments, good reporting matters almost as much as the raw result. This overview of addressing lab documentation challenges is helpful if you've ever had to compare reports, track retesting, or explain findings internally.
DIY Test Kits vs Accredited Lab Testing
| Feature | DIY Test Kits | Accredited Lab Analysis |
|---|---|---|
| Speed | Fast. Often same-day reading at the tap. | Slower. You wait for processing and reporting. |
| Best use | First-pass screening for common issues. | Confirmation, investigation, and higher-risk concerns. |
| Accuracy | Good enough for basic trends if used carefully. | Stronger for precise identification and interpretation. |
| Contaminant range | Usually limited. | Broader and more detailed. |
| User error risk | Higher. Reading colours and handling samples can skew results. | Lower at the analysis stage, but sample collection still matters. |
| When it falls short | Serious contamination questions, legal disputes, or system design decisions. | Overkill for a quick taste-and-scale check in some situations. |
| Typical buyer | Homeowner wanting quick answers. | Homeowner, office manager, facilities team, or business needing confidence. |
The honest trade-off
DIY testing is attractive because it gives you an answer quickly. The problem is that it can also give you an answer that feels more complete than it really is. A strip that says your pH looks normal doesn't tell you much about bacteria or metals.
Lab analysis takes more effort, but it's the right option when the outcome could change how you use the water, whether you need treatment, or whether a workplace has a duty to act.
A cheap test is excellent when the question is simple. It's poor value when the question is serious.
How to Collect a Water Sample Correctly
Bad sampling ruins good testing. That's true for a basic home kit and even more true for a lab sample.
Most inaccurate results I see don't come from dramatic lab failures. They come from ordinary handling mistakes. Touching the inside of a bottle cap. Filling from the wrong tap. Sampling after the water has been sitting in the line all weekend when the goal was to check the normal supply.
The practical home method
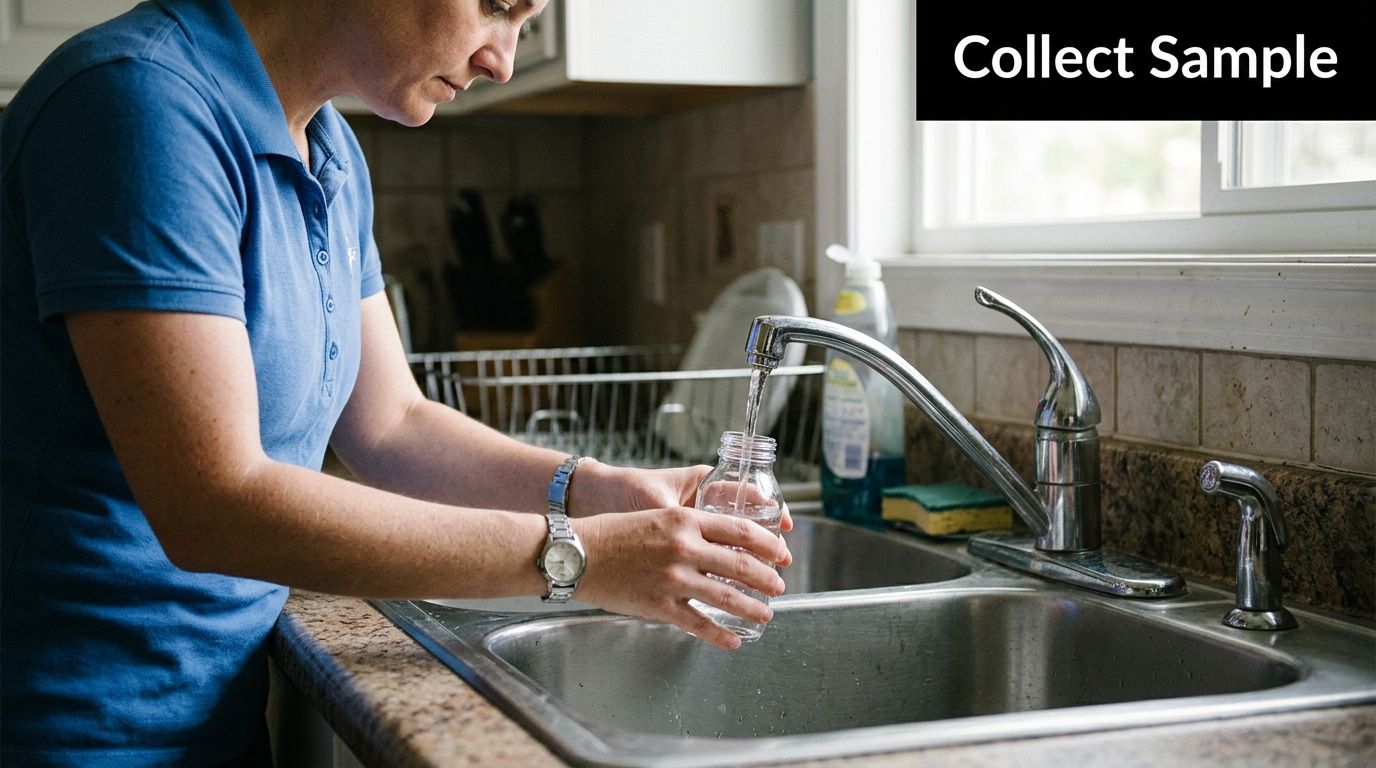
If you're collecting a sample for a lab or a more careful home check, keep it simple and disciplined:
- Choose the right outlet. Sample the tap that reflects the problem. Kitchen sink for drinking concerns. A specific office outlet if that's where complaints are coming from.
- Use the proper container. If a lab supplied the bottle, use only that bottle.
- Keep hands off the inside surfaces. Don't touch the bottle neck, inner cap, or inside of the container.
- Run the tap if the instructions call for it. This helps you avoid collecting stagnant water when the goal is to understand the active supply.
- Fill carefully. Don't rinse a sterile bottle unless the lab explicitly tells you to.
- Seal and label immediately. Delays cause confusion. So does leaving bottles unmarked on a bench.
Why professionals are obsessive about contamination
For ultratrace analysis in Australia, the field standard is far stricter than most homeowners realise. The recognised protocol is the dirty hands–clean hands method, where two people wearing powder-free polyethylene gloves sequentially handle double-bagged bottles so the outer and inner bags are removed separately before sampling. That approach is used to reduce contamination and improve representative sampling for accredited testing, and guidance also notes collecting at least three duplicate samples as a QA/QC measure, with reproducibility improved when samples are field-spiked with a known analyte amount (Australian field sampling protocol).
You probably won't use a two-person field team at your kitchen sink. But the principle matters. The sample must represent the water, not your handling.
If you contaminate the sample bottle, the report describes the bottle contents. Not necessarily your water.
A short visual walkthrough can help if you've never done this before:
Mistakes that waste time
- Sampling after cleaning with chemicals nearby: Sprays and residues can interfere.
- Using a random food jar: Fine for casual observation, not for proper lab work.
- Collecting from a swivel tap with built-up grime: Clean the outlet appropriately if instructed, or choose a better point.
- Leaving the sample in heat or sunlight: Transport and storage matter more than people think.
When in doubt, follow the lab's instructions exactly. Their bottle, their method, their timing.
Interpreting Results and Troubleshooting Common Issues
The test report matters only if you can connect it to a real-world problem. Most homeowners don't care about abbreviations on a page. They care whether the water is safe, why the kettle keeps scaling up, and whether the smell from the tap needs action.
Start by reading the report against the relevant Australian guideline values and the context of your property. Then ask a simpler question: does this result explain the symptom I have?
How to read the report without overreacting
A report often includes units, detection limits, and notes that look more alarming than they are. Focus on these points first:
- Which outlet was tested: A whole-house conclusion from one tap can be misleading.
- What category the result belongs to: Physical, chemical, or microbial.
- Whether the result aligns with the complaint: A high hardness reading explains scale. It doesn't explain bacteria.
- Whether the issue is aesthetic, appliance-related, or health-related: Those are different response paths.
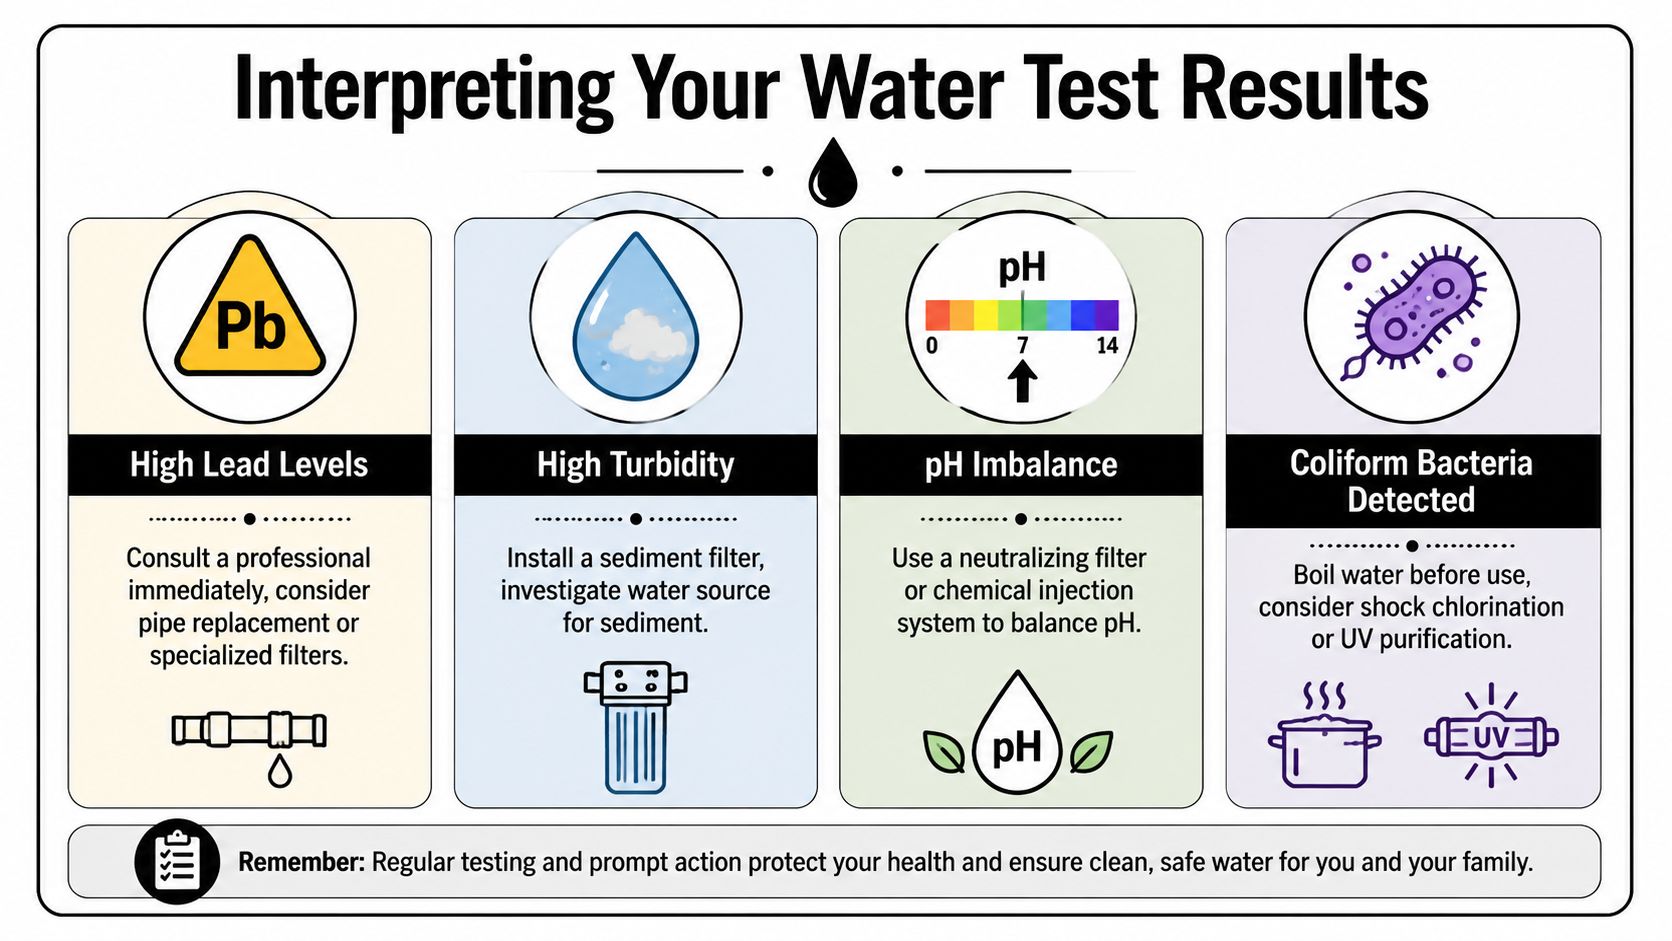
Common issues and what they usually mean
Hard water and scale
This is one of the most common Melbourne-area complaints, especially where people notice white build-up in kettles, on tapware, or inside boiling water equipment.
If the report points to increased hardness or mineral-related scaling tendency, the symptom and the result match. This is usually more of an appliance and maintenance problem than an immediate health concern, but it can shorten the life of heating elements, reduce efficiency, and make water taste less pleasant.
Useful first steps include:
- Check where the scale is worst: Whole house, kitchen only, or hot-water appliances only.
- Review your treatment goal: Drinking taste, appliance protection, or both.
- Choose the right treatment style: Carbon won't solve hardness. A scale-focused solution is a different category.
Chlorine taste or smell
If your water smells like a pool or has a sharp treated taste, a basic chemical screen often confirms chlorine-related issues.
This is usually the kind of problem where a simple fix can work well. For taste and odour concerns, point-of-use carbon filtration is often the first thing to consider. But don't confuse that with broad contaminant removal. A taste issue and a contamination issue aren't the same job.
Water that's unpleasant isn't always unsafe. Water that seems fine isn't always problem-free. Testing separates those two realities.
Metallic taste or concern about old plumbing
A metallic taste often leads people to suspect lead or other plumbing-related issues, especially in older homes or fit-outs. In these situations, DIY strips quickly reach their limit.
If a proper report identifies a metal issue, treat it as a plumbing and treatment decision, not just a filter shopping exercise. You need to know whether the source is incoming supply, internal pipework, or a specific fitting at one outlet.
Turbidity or visible sediment
Cloudiness can come from several causes. Some are harmless, such as entrained air that clears in a glass. Others point to sediment, disturbed plumbing, tank contamination, or filtration failure.
The practical check is simple. If the glass clears from the bottom up after standing briefly, that often suggests air. If particles settle or the cloudiness persists, investigate further.
When bacteria enters the conversation
Microbial results deserve a different mindset. If bacteria is detected in a sample intended for drinking use, don't treat that as a nuisance issue. Treat it as an immediate use and source-management problem.
This is especially relevant for:
- Tank water systems
- Low-use commercial outlets
- Properties after plumbing works
- Sites with poor maintenance history
The right response depends on the exact finding and the water source, but the broad principle is straightforward. Restrict risk first, then confirm cause, then choose treatment or disinfection.
What not to do with a confusing report
Don't cherry-pick the one normal-looking line and ignore the rest. Don't install the first filter you see based on one keyword. And don't assume every abnormal reading means the whole property is affected.
Reports need context:
- one tap or all taps
- mains or tank
- drinking use or appliance use
- old plumbing or new fit-out
- ongoing issue or sudden change
The report tells you what was found. Your job is to match that finding to the actual water system and the symptom on site.
From Test Results to Solution When to Call a Professional
Some water problems are simple. If your only issue is chlorine taste at a kitchen sink, a basic point-of-use filter may be enough. If you're mainly fighting scale on one appliance, a targeted treatment setup can make sense without redesigning the whole house.
But some results should end the DIY phase.
If a report raises concern about metals, bacteria, or a more complex chemical profile, it's time to get qualified advice. The same applies when you're responsible for staff amenities, hospitality service, tenant water, or a family supply that comes from a tank or other non-standard source. At that point, the question isn't “what filter is popular?” Instead, it's “what treatment matches this exact result?”
The trigger points that matter
Call a professional when:
- The report shows a health-related contaminant
- The issue affects multiple outlets and you can't isolate the source
- You need to protect expensive equipment as well as drinking quality
- You're comparing under-sink, whole-house, UV, carbon, or scale-control options
- You want the treatment installed and commissioned properly
Why the installation side matters
A good filter chosen badly won't solve much. Neither will a good filter installed in the wrong place. I've seen situations where people put a kitchen drinking-water filter on a problem that was affecting the entire hot water side, or where they tried to solve sediment, odour, and bacterial risk with one basic cartridge.
That's why the treatment decision should follow the test result, not the other way around.
If you need expert help turning a test report into a practical filtration plan, professional water filter installation in Melbourne is the sensible next step. The right setup might be a small under-sink system for an office tea point, a dedicated filter feeding a boiling tap, or a broader whole-of-property approach. The correct answer depends on the water source, the result, and what problem you're trying to solve.
The best system isn't the biggest one. It's the one that matches the water you have and the outcome you need.
If you've got test results you don't fully trust, or you want help choosing and installing the right filtration setup for your home or workplace, speak with Ring Hot Water. They supply and install practical water filtration and drinking water solutions across Melbourne, and they can help you turn uncertain water quality into a clear, workable fix.

