Uncategorized
Automatic Taps: The Complete Filter & Install Guide

Apr
The common trigger is small. Someone in the office kitchen fills a mug and says the water tastes flat. A café owner notices the sensor is still responsive, but flow has dropped off. A homeowner with a boiling and chilled setup starts hearing more gurgling under the bench than normal. The tap still works, so the problem gets ignored for another week.
Automatic tap issues typically begin this way. Not with a dramatic failure, but with a filter that’s overdue, a supply line that’s partially restricted, or a commissioning step that was skipped when the unit first went in. The visible part is the spout. The important part is the system behind it.
Automatic taps have deep Australian roots. Sensor-activated faucets, known as automatic taps, were invented by the Australian Norman Wareham, and his patent focused on no-touch activation to reduce bacteria transfer in hospitals and food preparation areas, a breakthrough that shaped modern systems used today as outlined in the history of automatic faucets. That history matters because these taps were never just about convenience. They were designed to solve hygiene and operational problems.
In Melbourne, the practical side matters most. Water quality varies. Under-sink space is frequently tight. Older homes can have pressure quirks. Office kitchens get hammered during peak times. Hospitality venues expect the tap to work all day, every day. If the filtration side is wrong, the tap becomes the messenger for a deeper system problem.
Understanding Your Water System
A sensor tap that dispenses boiling, chilled, or mixed water looks simple from above the bench. Underneath, it isn’t. You’ve got a filter, isolating valves, hoses, fittings, sometimes a boiler or chiller, sometimes a command module, and often very limited room to service any of it without scraping your knuckles on cabinetry.
The common mistake is treating the tap as the product. In practice, the filter and the installation quality decide whether the system stays reliable.
What usually goes wrong first
In offices, the first complaint is frequently taste. In homes, reduced flow or a change in response is more common. In hospitality, it’s downtime. Different symptoms, same pattern. The hidden service items were treated like an afterthought.
A neglected shut-off point makes even a simple cartridge change harder than it needs to be. If the isolation valve is stiff, buried, or missing altogether, routine maintenance turns into a mess. That’s why a proper shut-off valve setup matters before you ever touch the filter housing.
Why filtration carries the load
Filtration does more than improve taste. It protects valves, mixing components, and the internals of the tap system from sediment and other debris moving through the line. This is particularly important on automatic taps because sensor control doesn’t fix poor incoming water quality. It just delivers it electronically.
Practical rule: If the water tastes off, the flow has changed, or the unit sounds different, check the service items before blaming the tap head.
The taps that stay trouble-free are typically attached to systems that were planned properly from day one. Correct cartridge. Correct fittings. Accessible isolation. Enough room to replace parts without forcing hoses into sharp bends.
What Works in Practice
For a Melbourne home, the right answer is frequently a straightforward under-sink cartridge matched to the appliance and the incoming water. For offices and food service, the better approach is typically stricter servicing discipline and genuine parts where the manufacturer requires them.
The lesson is simple. Automatic taps don’t fail in isolation. The whole water system decides the result.
How to Choose the Right Water Filter Cartridge
A lot of cartridge problems start at the ordering stage, not under the sink. The box arrives, it clips in, and a week later the tap has poor flow, odd taste, or an intermittent fault that looks like an electrical issue. In many cases, the filter was physically compatible but wrong for the system.
Choose a cartridge in this order: compatibility, filtration purpose, flow behaviour, and ongoing service cost.
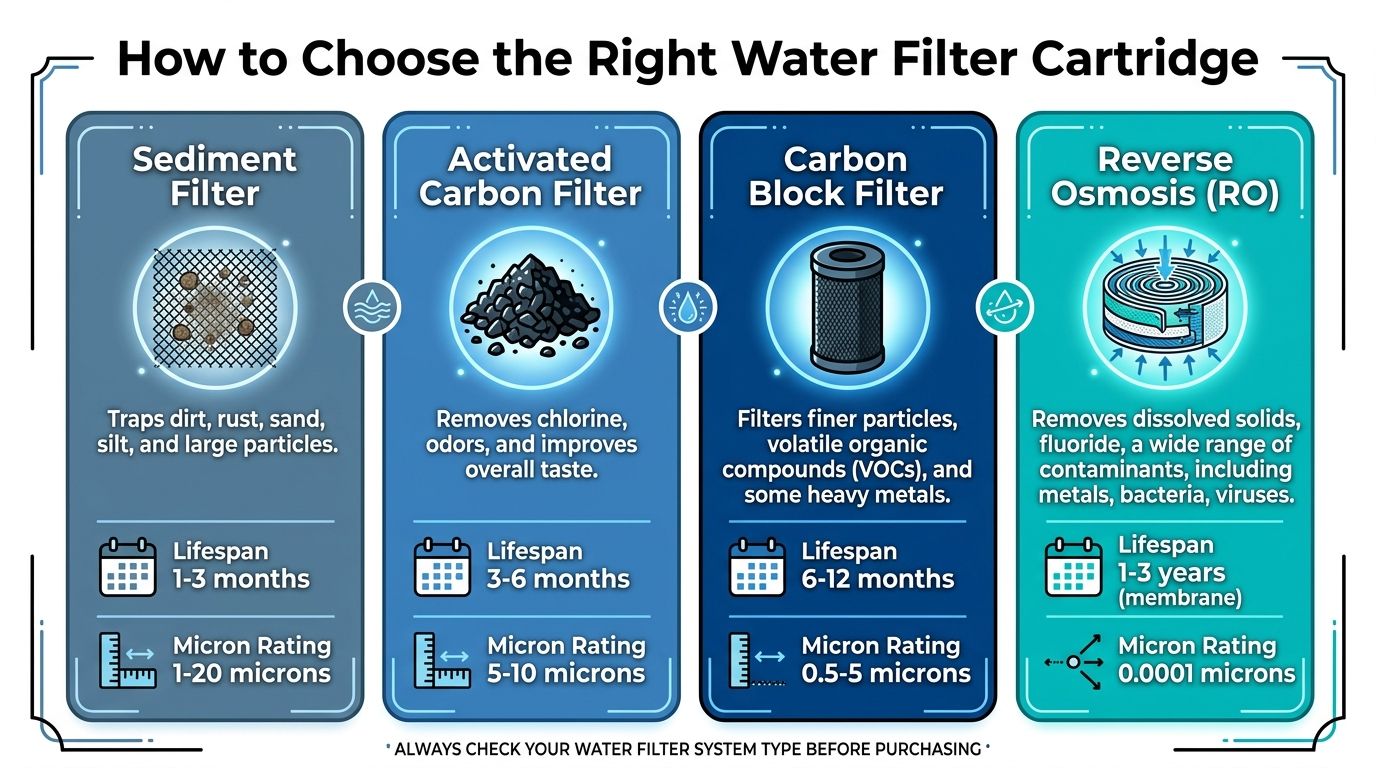
Start with compatibility
Physical fit comes first. If the cartridge does not match the filter head exactly, stop there.
Automatic tap systems, boiling units, and chilled systems frequently rely on a specific cartridge shape, seal arrangement, and internal flow path. A near match is not good enough. Forcing a cartridge into the head, reusing damaged seals, or assuming one brand is interchangeable with another is how small service jobs turn into leak calls.
Check four things before buying:
- Appliance model: Use the exact model number, not just the brand name.
- Filter head design: Quarter-turn, push-fit, bayonet, threaded, or proprietary.
- Connection arrangement: Hose size, inlet and outlet orientation, and any built-in bypass.
- Manufacturer requirement: Some units are designed around OEM cartridges and are less tolerant of substitutes.
A supplier page built around replacement water filter cartridges helps because it lets you match the application properly instead of guessing from a generic parts catalogue.
Choose for the water problem, not the label
“Universal” is a sales term. It is not a diagnosis.
Different cartridges solve different problems, and the right choice depends on what the tap and the connected appliance are dealing with. If there is visible sediment after plumbing work, the priority is debris capture. If users complain about chlorine taste or smell, carbon is typically the useful part. If the cartridge is there to protect a more expensive unit downstream, restriction and service life matter just as much as water quality.
Here is the practical difference.
| Water Filter Cartridge Comparison | |||
|---|---|---|---|
| Filter Material | Primary Target | Typical Micron Range | Best For |
| Sediment | Dirt, rust, larger particulate | Varies by model | Pre-filtration where debris is the main issue |
| Activated carbon | Chlorine, odour, taste issues | Varies by model | General kitchen drinking water improvement |
| Carbon block | Finer particulate plus taste and odour improvement | Varies by model | Under-sink drinking water and appliance protection |
| Reverse osmosis membrane | Dissolved contaminants requiring membrane filtration | Very fine membrane filtration | Specialised systems designed specifically for RO |
Category names only tell part of the story. The cartridge spec and the appliance requirement are what count.
Flow matters more than many buyers expect
A cartridge can be excellent at filtration and still be wrong for the job if it chokes the system. Automatic taps are sensitive to poor flow. A restrictive cartridge can lead to weak delivery, longer run times, unhappy users, and service calls that get blamed on the sensor or solenoid first.
That is why I look at the whole setup, not just the cartridge brochure. A residential filtered tap may tolerate a tighter cartridge if the demand is light. A busy office kitchenette or staff amenities area usually needs a cartridge that protects the system without creating constant flow complaints. Shelf price does not tell you that. Service history does.
Genuine versus third-party
There is no single rule here. Some third-party cartridges are perfectly serviceable. Some are trouble from day one.
Genuine parts usually reduce uncertainty around fit, seal quality, bypass design, and warranty support. Third-party cartridges can work well if they are made for that specific head and application. “Compatible” still needs checking.
Use a non-OEM cartridge only if the answers are clear:
- Seal match: Same sealing points and same fit under pressure.
- Flow suitability: Enough flow for the tap and any connected boiler or chiller.
- Filtration purpose: Correct media for taste, sediment, or equipment protection.
- Repeat availability: You can get the same part again at the next service.
Cheap cartridges frequently cost more over time. The extra cost shows up in callbacks, shorter service life, and harder fault-finding.
Match the cartridge to the installation type
The right cartridge for one job can be a poor choice somewhere else.
Under-sink residential systems
Most homes need a cartridge that improves taste without creating a noticeable drop in flow. Under-bench space is usually limited, so cartridge height and removal clearance matter. A technically suitable filter is still a poor choice if you have to twist hoses hard or dismantle half the cupboard to replace it.
Boiling and chilled tap systems
These systems are less forgiving. The filter is often part of the appliance protection strategy, not just a drinking water upgrade. If the manufacturer specifies an OEM cartridge, follow that instruction. It avoids reset issues, nuisance faults, and arguments over warranty support.
Commercial and public-use taps
In offices, schools, and hospitality settings, the service pattern matters as much as the water quality target. A cartridge with a lower purchase price can still be the wrong choice if it needs replacing more often, causes downtime, or takes longer to change in a cramped cupboard. If the tap body itself is old or unreliable, it may be smarter to review the whole assembly and compare that service burden with options such as Tap Replacement Services.
Price matters less than ownership cost
This is the part many buyers miss. Cartridge choice affects labour time, hygiene, downtime, and how often the system gets opened up for service.
For facility managers, the question is not just “What does the cartridge cost today?” It is “What does this setup cost to keep working properly over the next few years?” A cheap filter that blocks early, sheds performance quickly, or is hard to source later becomes an expensive maintenance item. In automatic tap systems, every extra service visit also means more handling of tap components, more disruption, and more chances for contamination during rushed maintenance.
That is why boring, predictable parts usually win. They are easier to stock, easier to replace, and easier to budget for.
A practical buying checklist
Before ordering, confirm these points:
- Exact model number: Brand alone is not enough.
- Correct filter head: Match the locking and sealing arrangement.
- Water issue being addressed: Taste, odour, sediment, or equipment protection.
- Expected flow demand: One kitchen tap is different from a busy staff room.
- Space for removal: Check vertical clearance and hose movement.
- Future supply: Make sure the same cartridge will still be available at the next service.
A good cartridge choice should be uneventful. The tap runs properly, the water quality is consistent, and the next replacement is straightforward instead of a parts hunt.
A Practical Guide to Filter Replacement
Most filter changes are straightforward if the system has been installed sensibly. Most difficult filter changes are only difficult because access is poor, the wrong cartridge was supplied, or nobody isolated the water properly before starting.
If you’re replacing a filter on automatic taps, work slowly and keep the area tidy. A rushed changeout causes more leaks than the cartridge itself.
Preparation before you touch anything
Start by identifying three things under the sink or in the cupboard: the isolation point, the filter head, and the hose route. If you can’t clearly see those, don’t begin until you can.
Have these on hand:
- Dry cloths: For catching drips and wiping fittings clean before inspection.
- A shallow tray or towel: Useful under the cartridge area.
- The correct new cartridge: Match it against the old one before removing anything.
- Torch or work light: Most under-bench service spaces are poorly lit.
- Gloves if needed: Handy when housings are wet or cramped.
Before removal, shut off the local water supply and relieve pressure through the tap where possible. On systems with storage or pressure components, give it a moment before undoing anything.
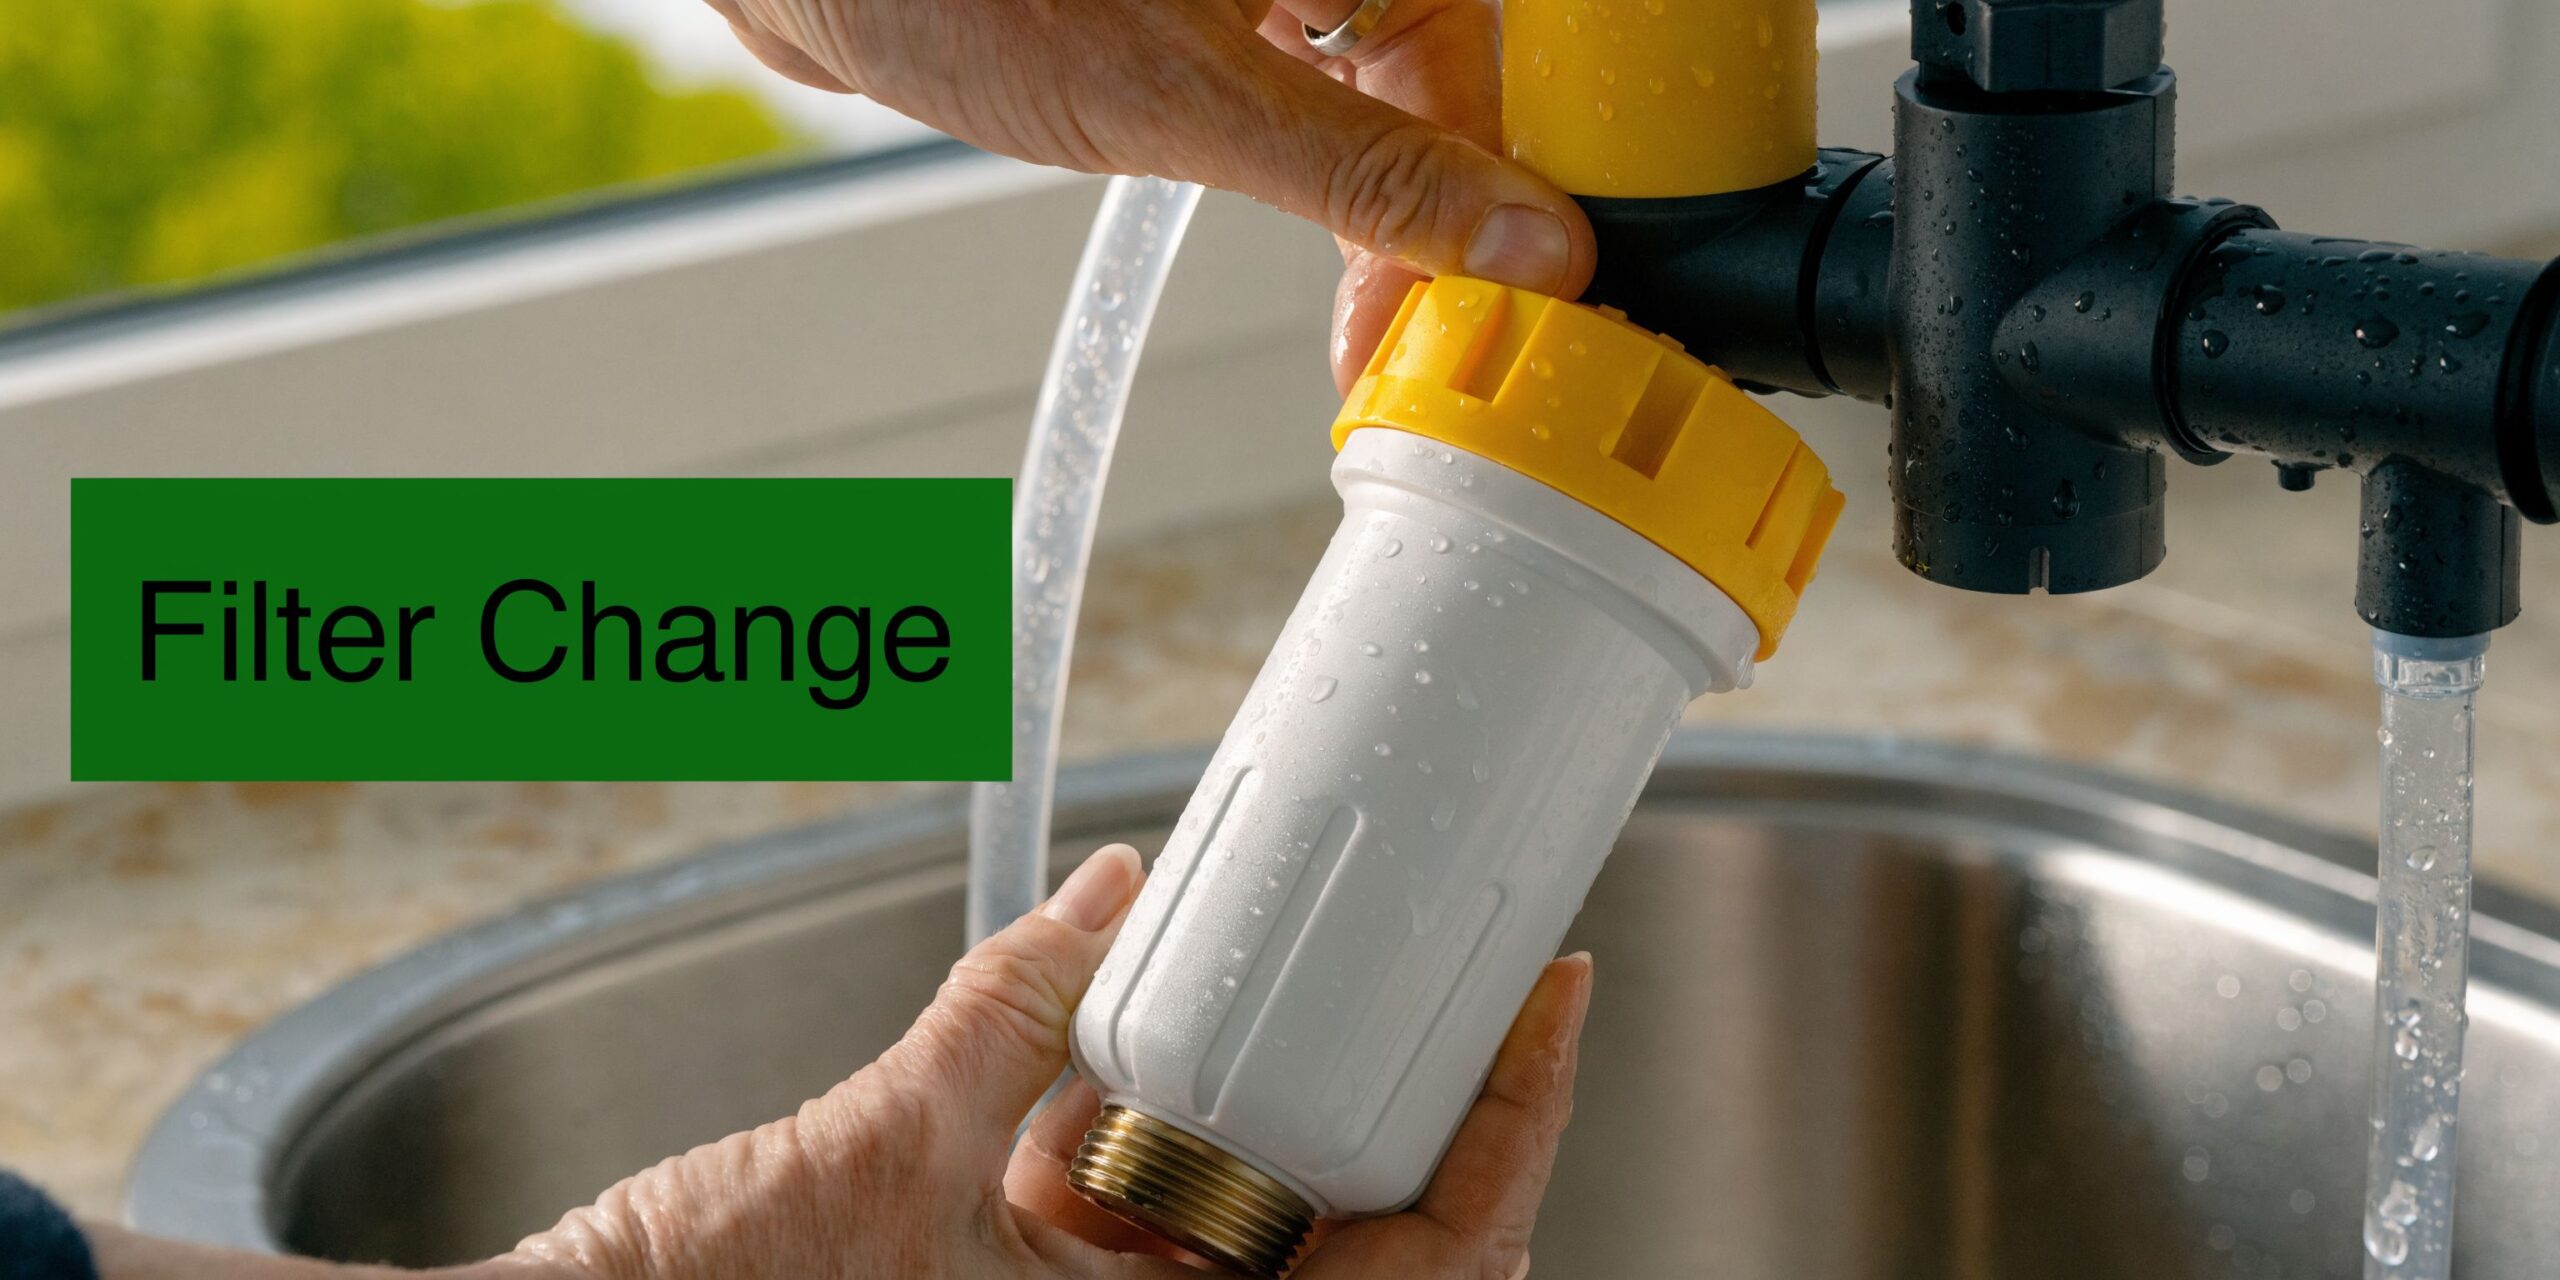
Replacing a standard under-sink cartridge
This is the most common service job in domestic kitchens.
- Isolate the feed. Confirm the water is off at the valve, not just mostly off.
- Depressurise the line. Run the tap until flow drops away.
- Support the old cartridge. Twist or release it according to the head design.
- Check the sealing face. Dirt or a displaced O-ring can create a slow leak on restart.
- Fit the new cartridge. Align properly before locking it in place.
- Restore water slowly. Don’t snap the valve fully open at once.
- Flush the new cartridge. Follow the cartridge instructions for an initial flush.
- Inspect with a dry hand and dry cloth. Tiny leaks show up better when the area starts dry.
The flush matters. Fresh media frequently needs a proper rinse before the water tastes right and before trapped air works out of the line.
Servicing a boiling and chilled tap system
This category needs more discipline because the filter is only one part of a larger appliance system.
For Zip HydroTap automatic taps, commissioning isn’t optional. The OEM process includes connecting water with the specified foam-insulated tubes, running a 5 to 10 minute flush cycle to purge air, and verifying settings through the Command Center. Following that procedure is tied to a 97% success rate per Zip AU installer data in the Zip residential installation guide.
The practical sequence
- Power awareness: If the unit includes an underbench command or boiling module, use the manufacturer’s safe shut-down or service procedure.
- Filter swap: Replace the cartridge exactly as specified for that system.
- Tube check: Make sure insulated lines are seated cleanly and not twisted.
- Controlled restart: Bring water back first, then power in the correct order for the appliance.
- Full flush: Don’t cut the purge cycle short because the water “looks fine”.
- Setting verification: Confirm the unit has returned to normal operation and any service indication has been cleared.
The biggest mistake on boiling and chilled systems is treating a filter change like a mere tap accessory swap. It isn’t. You’re servicing an appliance.
Whole-home cartridge changes
Whole-home systems are physically larger but conceptually simpler. The difference is consequence. If you get it wrong, every outlet downstream can be affected.
Key habits that prevent trouble
- Photograph the setup first: It helps if there are multiple housings or stages.
- Change one stage at a time: Don’t remove everything and hope the order is obvious later.
- Inspect housing threads: Grit in the threads can stop a clean reseal.
- Lubricate seals only if the manufacturer allows it: Don’t improvise with random grease.
- Repressurise gradually: Sudden pressure can expose weak points in older housings.
What to check after replacement
A successful filter change isn’t finished when the water comes back on.
Look for:
- Leaks at the head or housing
- Unexpected noise
- Air bursts that continue too long
- Reduced flow that wasn’t present before
- A warning light or service alert that hasn’t reset
If flow drops sharply straight after a change, don’t jump straight to blaming supply pressure.
When not to DIY
There are times to stop and call a technician.
- Hardwired appliance uncertainty: If electrical isolation is unclear.
- Confusing hose layout: Especially on older retrofits.
- Stiff or damaged valves: Forcing them can create a bigger repair.
- Commercial downtime risk: If the kitchen or office depends on the unit immediately.
A proper filter replacement should restore normal operation without drama. If the job feels like improvisation, that’s a warning sign that the system needs a broader check, not just a new cartridge.
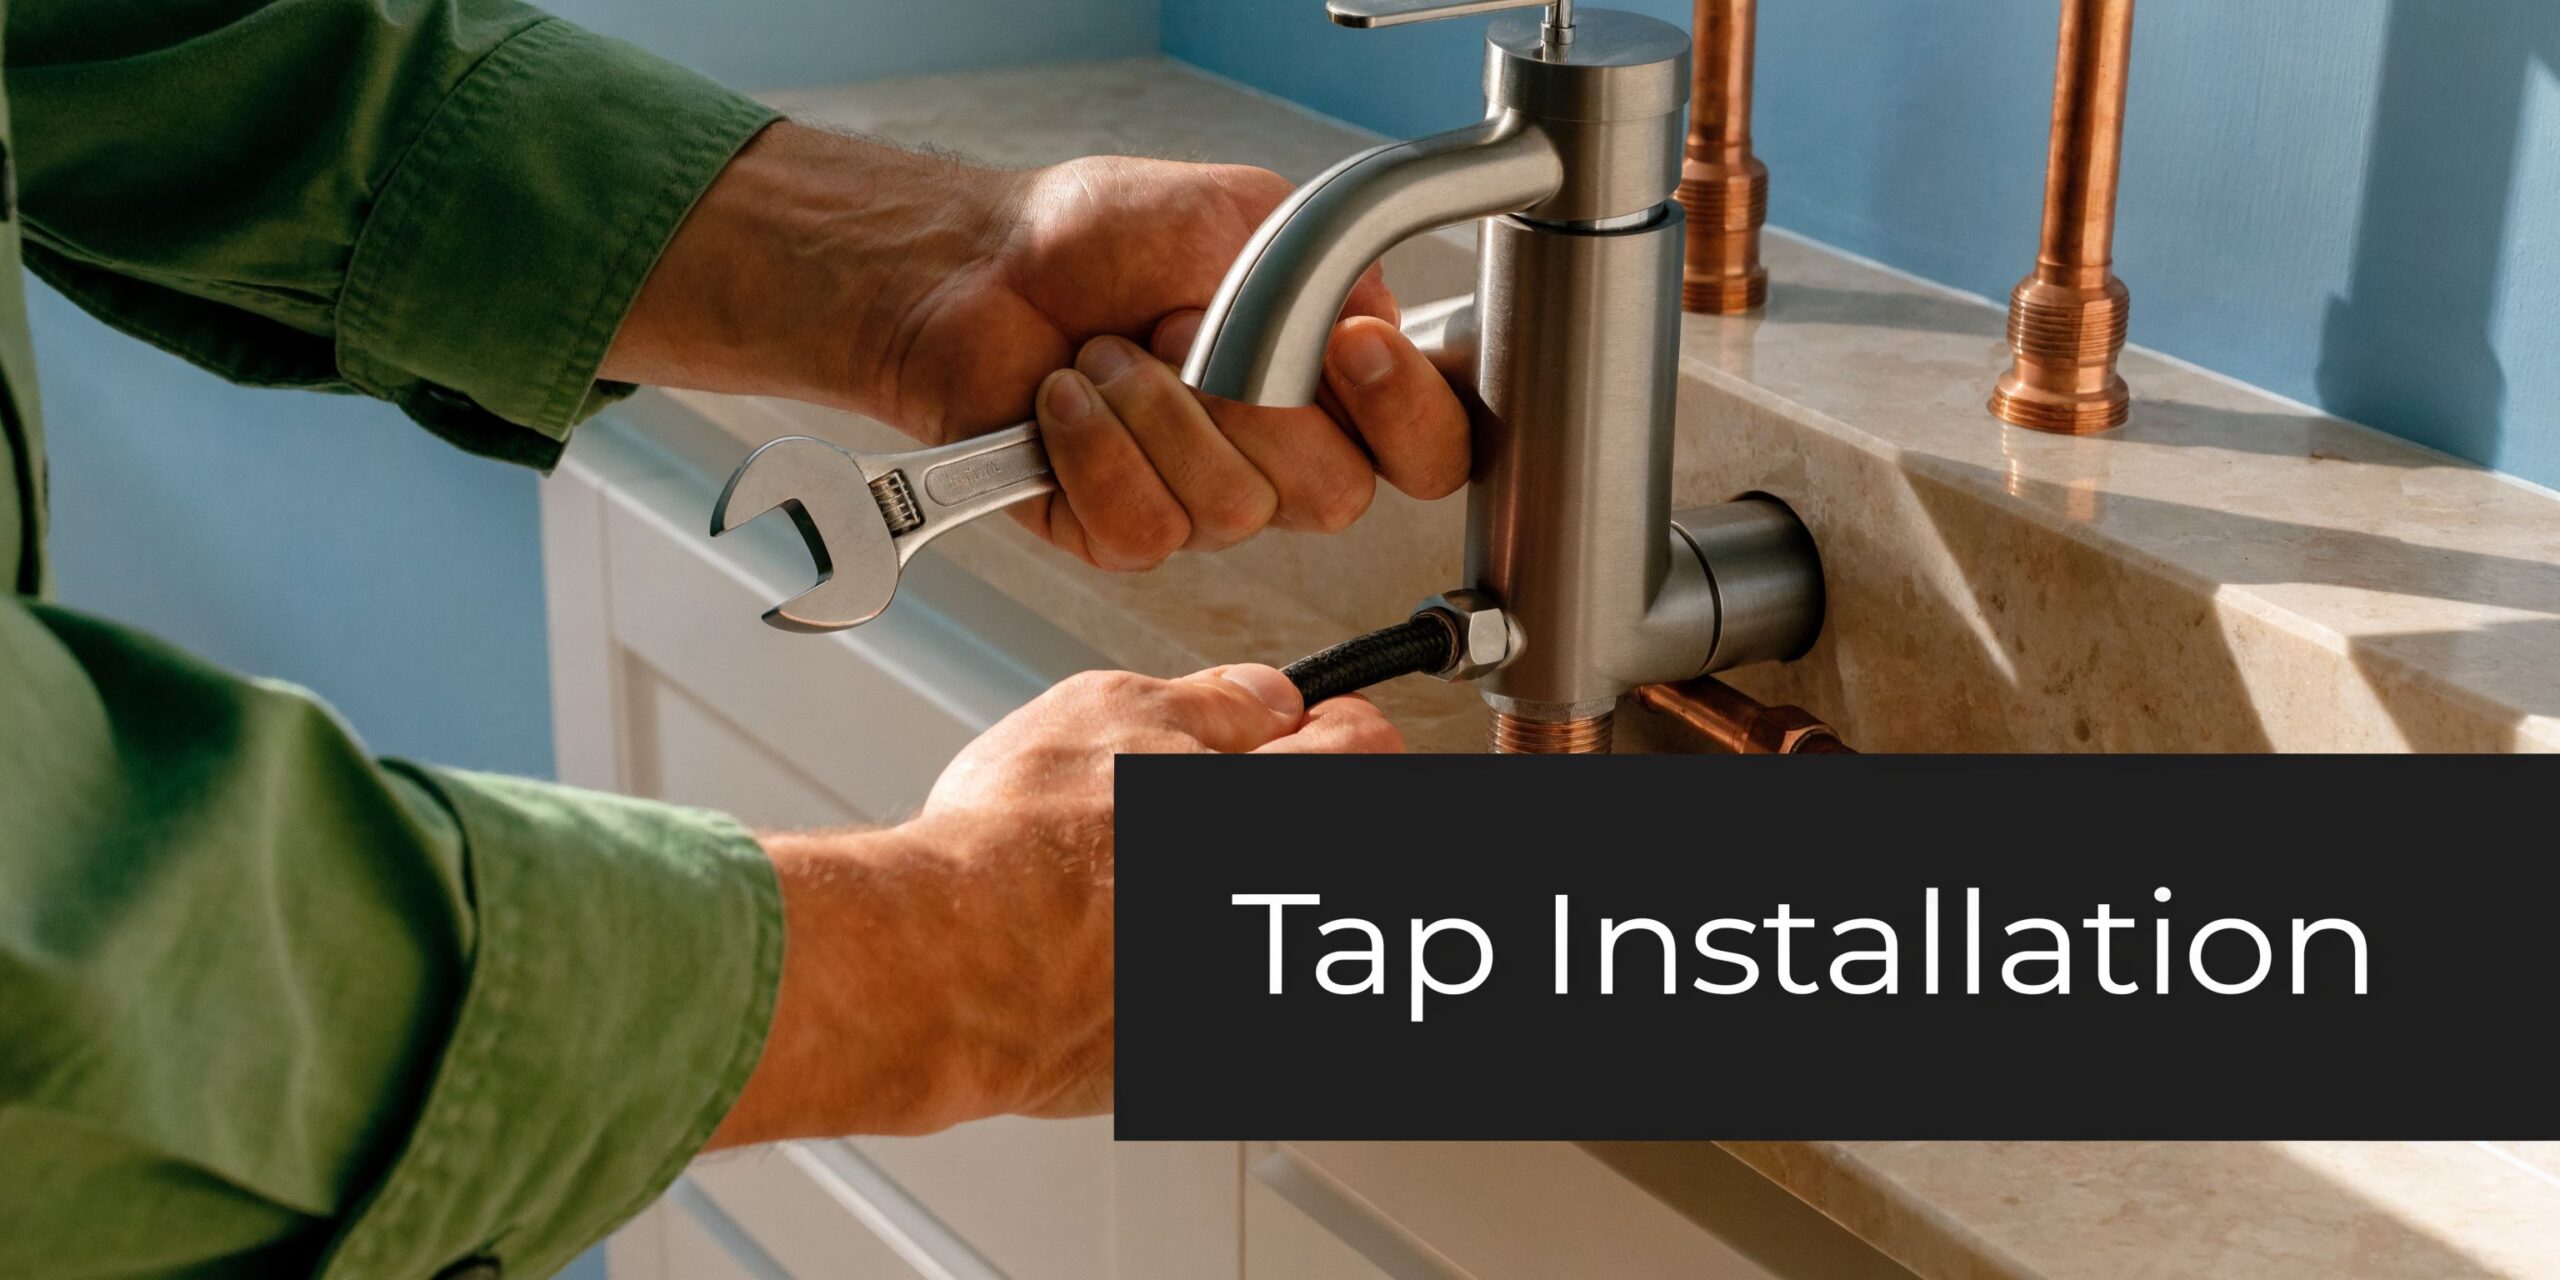
Guidance for New Automatic Tap Installations
A new automatic tap can work beautifully or become a permanent callback. The difference is typically decided before the tap body is tightened onto the bench.
The trades that get good long-term results don’t just install the visible fixture. They plan the service space, test the supply, and use fittings that make sense for the appliance.
Pressure comes first
For many automatic sensor taps, adequate dynamic pressure from both hot and cold supplies is essential, and unequal pressure is a significant cause of failures in Melbourne’s older homes. Low pressure is also a major service issue, linked to an estimated 45% of issues in plumbing forum data related to these systems according to the ATT-3001C installation guidance.
That’s the point most rushed installs miss. The tap may power up. The sensor may respond. But if the incoming pressure is poor or uneven, performance will be erratic from day one.
What to check before the tap goes in
Use this pre-install list before drilling, connecting, or commissioning:
- Bench and underbench clearance: Make sure there’s room for the body, hoses, filter, and any boiler or chiller.
- Service access: If the cartridge can’t be removed later, the install isn’t finished properly.
- Isolation points: Add accessible valves where they’ll be usable.
- Power arrangement: Confirm whether the tap is battery-operated or supplied by transformer.
- Hose route: Avoid kinks, crushing, and unnecessary loops.
For local projects, a practical reference point for layout and service planning is water filter installation in Melbourne, especially where under-sink filtration and appliance access need to work together.
Fittings and connection choices
Good installs separate themselves from neat-looking ones through fitting and connection choices. The neat-looking install can still be awkward to service if the fittings choice is wrong.
In retrofits, compact push-fit and appliance-appropriate hose systems often make more sense than forcing bulky threaded combinations into a cramped cupboard. On some under-sink boiling tap jobs, John Guest style connections are practical because they simplify routing and later service. On other jobs, brass threaded fittings are still the right call if the layout allows it and the appliance expects it.
If the hose route is under tension when you finish, the install isn’t done yet. Re-route it.
For readers comparing service approaches in different markets, this overview of Tap Replacement Services is a useful example of how plumbers frame replacement scope, labour, and fixture compatibility. The lesson transfers well even though local product standards differ.
Commissioning is part of the installation
A lot of poor installs are poor commissioning. The tap was mounted correctly, but the system was never brought online properly.
Check these points before handing over:
| Installation checkpoint | Why it matters |
|---|---|
| Equal hot and cold pressure | Prevents unstable performance and poor temperature control |
| Secure hose seating | Reduces weeping joints and nuisance leaks |
| Accessible filter location | Makes future maintenance realistic |
| Correct power setup | Prevents intermittent sensor faults |
| Full flush and test cycle | Clears air and confirms normal operation |
After the plumbing side is proven, it helps to watch a visual walk-through of the commissioning mindset in practice.
What works and what doesn’t
What works is boringly consistent. Balanced pressure. Correct hose routing. Filter placement that allows future changes. Fittings matched to the appliance. A full test before the installer leaves.
What doesn’t work is guessing. Guessing pressure, guessing cartridge compatibility, guessing whether the old isolation valve will be fine, guessing whether the underbench space is enough. Automatic taps are forgiving in some ways, but not when the basics are skipped.
Long-Term Maintenance and System Care
Six months after installation, the true quality of an automatic tap system becomes apparent. The sensor still has to trigger properly. The flow still has to be clean and consistent. The cupboard under the bench should still be dry. If the system only works well when it is new, it was never a low-cost option.
Good long-term care is about total ownership cost, not just the purchase price. Filters, batteries or power faults, scale, valve wear, wet cabinetry, nuisance callouts, and downtime all add up. On Melbourne jobs, I frequently see the same pattern. The cheaper shortcut at install typically becomes the system that needs the most attention later.
The ownership costs people miss
Marketing for touchless taps frequently focuses on convenience and hygiene. Fair enough. What gets missed is the routine service load that comes with them.
Sensors need cleaning. Solenoids do wear. Hard water scale affects moving parts and flow performance. Battery models need planned replacement, and mains-powered units still need their power supply checked when faults appear. None of that is unusual. It is part of owning an automatic tap system for the long haul.
That matters even more on filtered or combined hot water setups, where one neglected part can create symptoms somewhere else. A tired cartridge can reduce flow. A scaling boiling unit can make the tap look like the problem. A slow seep at a fitting can damage joinery long before anyone notices the water itself.
Build the service schedule around use, not hope
A staff kitchen used all day needs a different maintenance rhythm from a home sink used morning and night. The mistake is setting one replacement interval and treating every site the same.
A practical schedule typically includes:
- Monthly visual checks: Look for moisture, staining, hose rub points, and fittings that have started weeping.
- Regular sensor cleaning: Wipe the lens and surrounding body so activation stays consistent.
- Planned cartridge changes: Replace filters by actual usage and water condition, not by memory.
- Isolation valve exercise: Open and close valves periodically so they do not seize when service is due.
- Appliance inspection: Check connected boiling or chilled units for noise, warning lights, or unusual cycling.
Simple habits save money here. A five-minute inspection can prevent a soaked cabinet panel, a failed service call, or a tap that gets blamed for a problem sitting further back in the system.
Hot water care and tap care are the same job
On underbench systems, the tap is the visible end of a larger assembly. If the boiling unit is scaling up, if the hoses are ageing, or if the filter has gone well past its service life, the user notices it at the outlet first.
For that reason, I never treat automatic tap maintenance as a standalone task. The broader service routine matters just as much. These essential hot water maintenance tips make the same point from another angle. Small checks done on time are cheaper than emergency repairs and far less disruptive.
Good maintenance is routine. Clean sensor. Dry cupboard. Correct cartridge. Parts changed before the complaints start.
Genuine parts reduce repeat faults
Parts discipline matters over years, not days. A substitute cartridge that almost fits, a seal from mixed stock, or a generic valve that changes flow characteristics can turn a simple service visit into fault-finding.
Genuine parts are not about brand loyalty. They are about repeatability, fit, and knowing what the system will do after service. In practice, Ring Hot Water supplies genuine spare parts and filtration components for systems such as Zip, Stiebel Eltron, Boiling Billy, Birko, and related under-sink applications, along with fittings used in domestic, commercial, and RV work. That helps when the same site needs the same part again later, not a workaround chosen because the original item was not on hand.
End-of-life handling is part of the job
Used cartridges, old seals, and failed service parts should not be left under the sink. Keep the removed filter only long enough to confirm the new one is seated properly, the system is dry, and the tap is operating as expected. After that, dispose of parts according to the cartridge type and local waste requirements.
Tidy service habits make the next visit faster. They also make hygiene easier to manage, which is one of the reasons people choose automatic taps in the first place.
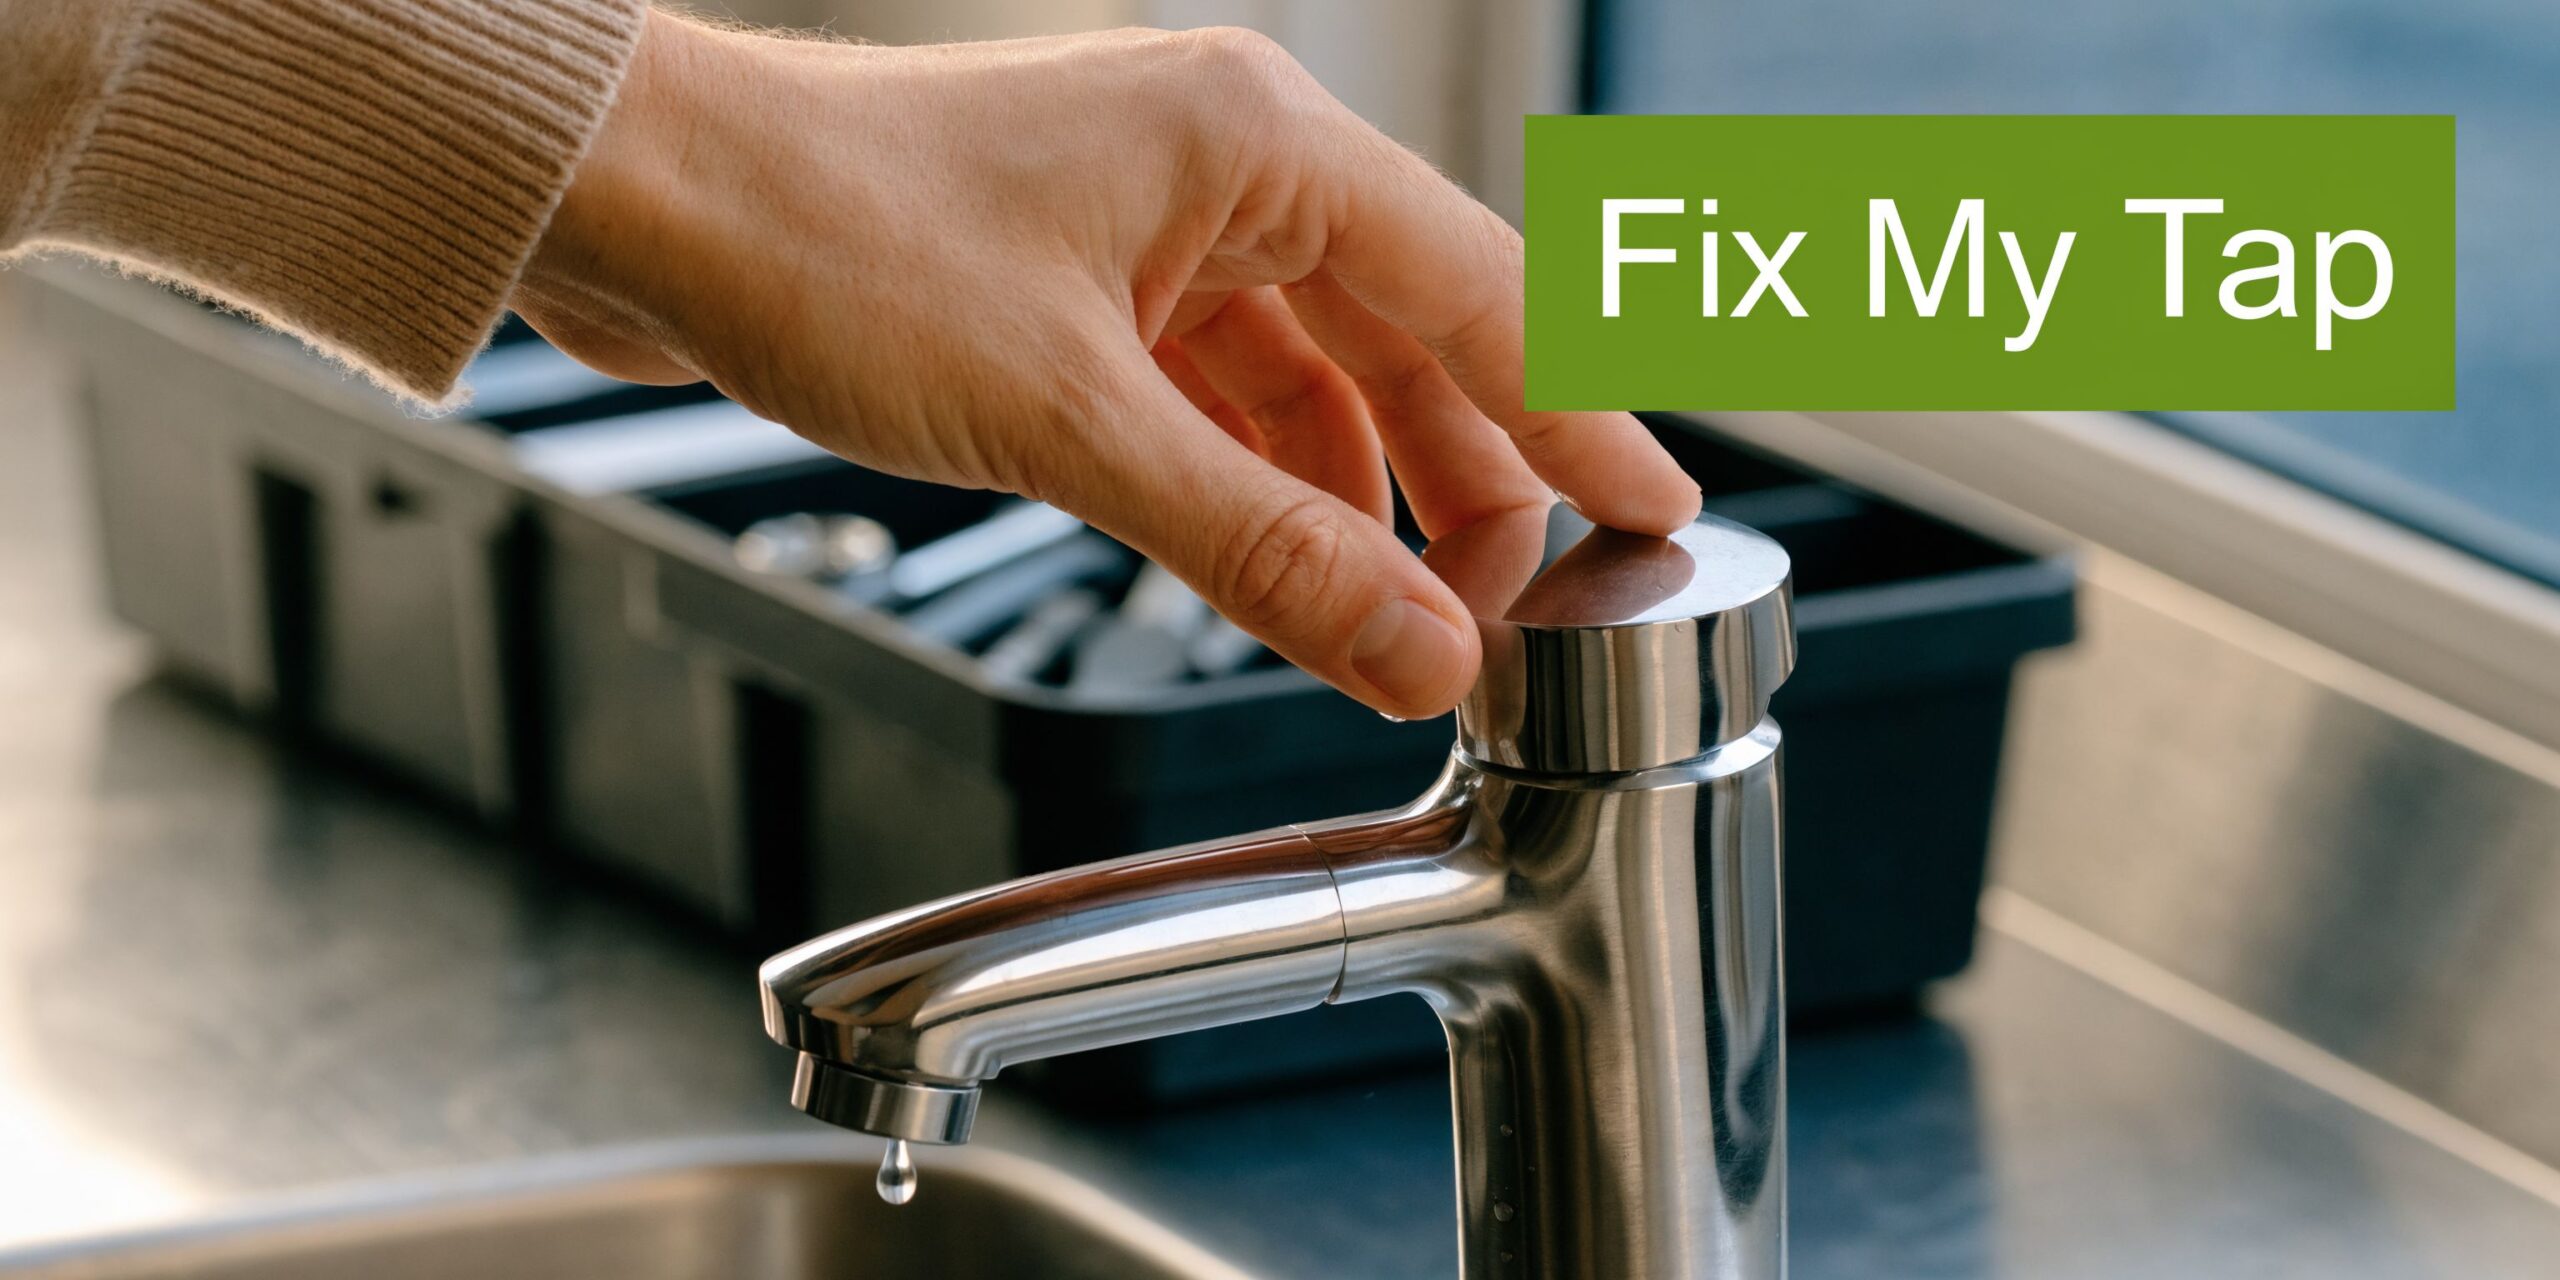
Troubleshooting Common Tap and Filter Issues
When automatic taps start misbehaving, the symptom is typically obvious but the cause isn’t. Low flow can be a blocked aerator, a half-open valve, a badly seated cartridge, or a pressure issue. A hygiene complaint can come from the user area around the sensor, not the water coming through the line.
The fastest diagnosis starts with the most recent change. If the problem began right after a filter replacement or installation, inspect that work first.
Low flow after a filter change
This frequently points to one of four things:
- Valve not fully reopened: Check both supply and appliance isolation points.
- Cartridge not seated properly: Remove and reinstall if the head design allows.
- Air still trapped in the line: Run the required flush longer.
- Debris disturbed during service: Check strainers or outlet screens if fitted.
If the flow was fine before the change, don’t jump straight to blaming supply pressure.
A slow leak under the bench
A slow leak typically comes from the cartridge head, a disturbed seal, or a hose connection that felt tight but didn’t seat cleanly.
Use a dry cloth to wipe every joint, then watch closely while the system is under pressure. Dry surfaces expose the true leak point. Wet cupboards hide it.
Sensor works, hygiene still isn’t right
The hygiene paradox matters here. Automatic taps reduce cross-contamination by removing handle contact, but their design can create cleaning blind spots. Stagnant water in sensor housing or detection zones can potentially create microbial breeding grounds, which matters in humid Australian conditions and hygiene-sensitive settings such as food service as discussed in Graff’s sensor collection notes.
That means “touchless” doesn’t automatically mean “self-cleaning”.
Practical ways to reduce the risk
- Clean the sensor area routinely: Don’t just wipe the spout tip.
- Prevent pooling: Check the tap angle and sink geometry.
- Keep surrounding surfaces dry: Moist build-up around the housing is a warning sign.
- Review placement in food areas: A tap that splashes back onto itself is poorly positioned.
A clean-looking automatic tap can still have problem areas around the sensor housing. Wipe where the water and vapour collect, not just where the hand reaches.
Reminder light won’t reset
This is typically procedural rather than mechanical. Some systems require a full restart sequence or appliance menu reset after the cartridge is changed. If the water quality and flow are back to normal but the light remains on, go back to the appliance reset procedure before replacing more parts.
When to escalate
If you’ve got repeated flow loss, sensor inconsistency, or the same leak returning after a careful re-fit, stop replacing consumables and inspect the broader system. At that point, the issue is usually installation quality, component wear, or a supply condition upstream of the tap.
Your Partner in Water System Excellence
Automatic taps reward careful choices. The right cartridge keeps the water quality where it should be. The right installation prevents awkward faults that only show up after handover. Consistent maintenance keeps the tap, filtration, and any connected boiling or chilled unit working as one system instead of a collection of parts.
That matters whether you’re managing a family kitchen in Yarraville, an office fit-out in the CBD, or a hospitality site that can’t afford nuisance downtime. It also matters for trades sourcing fittings, valves, hoses, and genuine service parts that need to fit properly the first time.
A well-run water system is rarely complicated. It’s just organised. Correct parts. Good access. Clean commissioning. Sensible maintenance.
If you need help choosing a cartridge, sorting out an automatic tap install, or finding the right genuine spare part for a boiling, chilled, or filtration setup, Ring Hot Water can help with practical advice, parts supply, and Melbourne-based service support.