Hot Water Services
How to Test a Hot Water Element A Step-by-Step Guide
Apr
So, the hot water has suddenly vanished, and your morning shower was a bone-chilling surprise. When this happens, a faulty heating element is almost always the prime suspect. Before you start ringing for an emergency call-out, there’s a straightforward test you can do to see if the element is really the culprit.
(All hard wired electrical items must be installed by a licenced electrician)
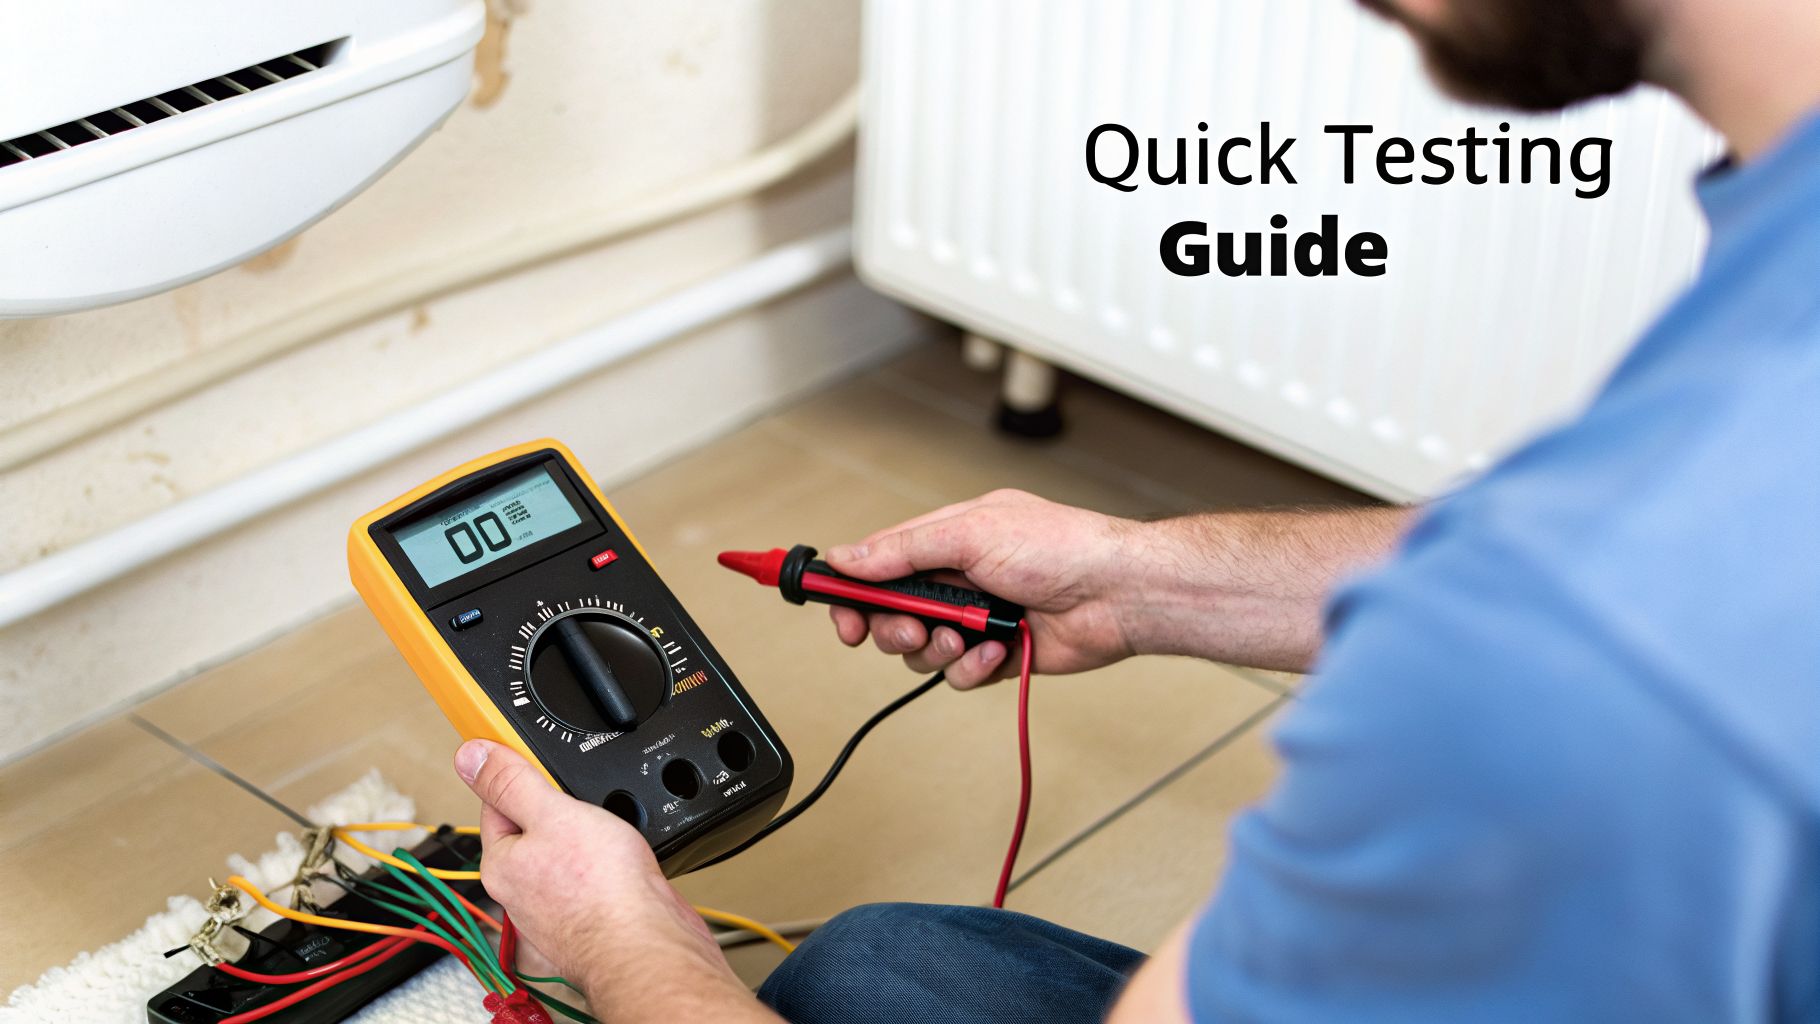
Your Quick Guide to Testing a Hot Water Element
Think of the element as the workhorse of your electric hot water system. It’s a simple but vital part that turns electricity into heat. When it gives up the ghost, your heater stops working. It’s a good idea to familiarise yourself with the 7 Unmistakable Signs Your Water Heater Is Failing, as these often point directly to an element on its last legs.
But don’t worry, diagnosing it isn’t as complicated as it sounds. With a few safety steps and a multimeter, you can get a clear answer in minutes.
What Are We Actually Testing?
At its core, we’re testing the element’s electrical resistance. In simple terms, resistance is a measure of how much a component pushes back against electricity flowing through it. A healthy element has a very specific resistance, measured in ohms (Ω), that allows it to heat up properly.
A multimeter is your best friend here. It’s a handheld device that acts like a stethoscope for electrical parts, letting you “listen” to the element’s health. You’re looking for one of two clear results:
- A “Good” Reading: A working element will show a resistance value somewhere between 10 and 30 ohms. This tells you the internal wiring is intact and ready to do its job.
- A “Bad” Reading: If the element is broken, it creates an ‘open circuit’. Your multimeter will display ‘OL’ (for Open Loop), an infinity symbol (∞), or just won’t show a reading at all. This is a dead giveaway that the element needs replacing.
Expert Tip: The reading doesn’t just tell you if it’s broken, but how. An ‘Open Loop’ means the internal wire has snapped. A reading of zero, on the other hand, means you have a dangerous short circuit. Both mean it’s time for a new element.
Quick Element Test Cheat Sheet
To make things even easier, here’s a little cheat sheet. It breaks down what your multimeter reading means and what you should do next. This is the same quick diagnostic check we run in the field.
| Multimeter Reading | What It Means | Next Step |
|---|---|---|
| 10-30 Ohms (Ω) | The element is likely healthy and functional. | The fault is elsewhere. Check the thermostat or power supply next. |
| ‘OL’ or Infinity (∞) | The element has failed. It’s an open circuit. | Replace the hot water element. |
| 0 Ohms (Ω) | The element has a short circuit. This is a critical failure. | Replace the element immediately. |
| Any Reading to Ground | There’s a ground fault. This is a major safety hazard. | Turn off power and replace the element. Check system wiring. |
Understanding these readings takes the guesswork out of the equation. You'll know for sure whether a simple element swap will get your hot water running again or if you need to look for a different problem within the system.
Safety First: Preparing for a Safe Test
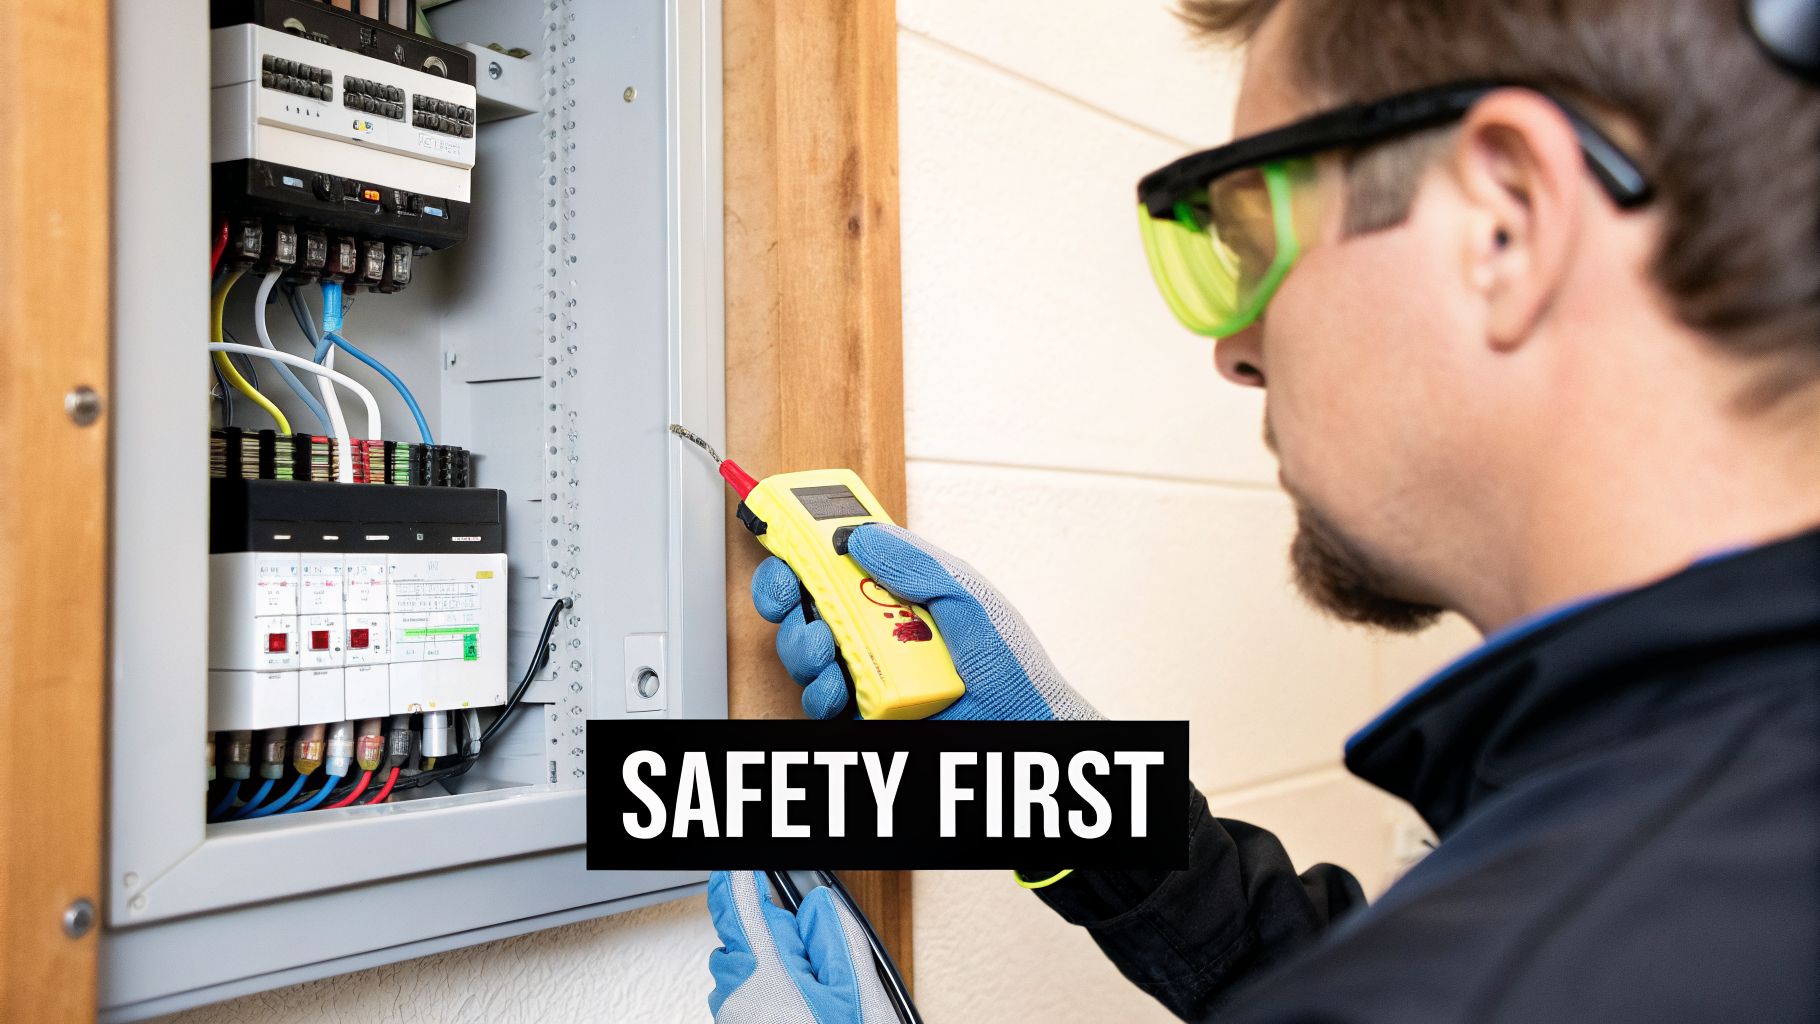
Alright, before you even reach for a multimeter, we need to talk about safety. When you're about to test a hot water element, you’re dealing with the potent mix of electricity and water. This isn’t a step to rush through; it’s the most important part of the entire job.
Think of it like a pilot's pre-flight checklist. They don't cut corners to get in the air faster, and you shouldn't either. The first and most critical action is to completely kill the power to your hot water system.
Isolating the Power Supply
First up, head to your home’s main electrical panel—what we often call a switchboard or circuit breaker box. Your job is to find the circuit breaker that controls your hot water heater, which should be clearly labelled.
Once you’ve got it, flick the switch firmly to the "OFF" position. If you're in an older home with a fuse box, you'll need to remove the correct fuse completely from its holder.
Critical Safety Check: Flipping a switch isn't enough. You must always assume a circuit is live until you've proven it's dead. This is the golden rule of any electrical work, and it's non-negotiable.
To be 100% certain the power is off, you need to verify it. Use a voltage tester or the voltage setting on your multimeter and carefully touch the probes to the wires at the element's terminals. The tester must read zero. Only then is it safe to proceed.
Getting Your Safety Gear Ready
With the power confirmed dead, it’s time to gear up. The right personal protective equipment (PPE) is non-negotiable when you’re learning how to test a hot water element.
Your safety kit should have:
- Insulated Gloves: These are your backup. They offer an extra, crucial layer of protection from any stray current.
- Safety Glasses: Essential for protecting your eyes from dust, debris, or any unexpected drips.
- A Dry Workspace: Make sure the floor around the hot water unit is bone dry. If there’s any sign of a leak or puddle, get it cleaned up and thoroughly dried before you begin.
It's also a smart move to turn off the water supply to the heater. While it's not strictly required for the electrical test itself, it's good practice. If you find the element is faulty and needs replacing, you'll have to drain the tank anyway, so you're just getting a step ahead. If you're not sure where your valve is, our guide on how to locate and use a water shut off valve will show you what to do.
Only once you have ticked off every single one of these safety steps should you move on. This careful prep work means you can focus entirely on diagnosing the problem without putting yourself at risk.
Meet Your Go-To Diagnostic Tool: The Multimeter
If you’re planning to test a hot water element, the multimeter is the single most important tool for the job. At first glance, the dial full of symbols and numbers can seem a bit intimidating, but don't let that put you off. Think of it as a stethoscope for your home's electrical parts.
Its whole purpose is to give you a clear "yes" or "no" answer about an electrical component's health. We’ll walk through exactly how to use it, turning it from a confusing gadget into your most reliable assistant for diagnosing your hot water system.
How to Read the Multimeter Dial
Take a look at the central dial on your multimeter. You’ll see a bunch of different symbols, but for testing a hot water element, we only need to focus on one: resistance, which is measured in ohms. The symbol for this setting is almost always the Greek letter Omega (Ω).
Resistance is what tells us if the filament inside the element is still a complete, unbroken circuit that can heat water, or if it has failed.
Setting it up is simple:
- Connect the Probes: Your multimeter will have a red (positive) and a black (negative) probe. The black probe plugs into the port labelled “COM” (common), and the red one goes into the port marked with “VΩmA”.
- Select the Right Setting: Turn the dial to the resistance (Ω) section. You’ll want the lowest setting that is still higher than the expected reading. For a hot water element, a setting of 200 ohms is usually the perfect choice.
That’s all there is to it. Your multimeter is now ready to get you the answers you need.
The Two Critical Multimeter Tests
With your multimeter set up, you’re ready to perform two quick checks. These tests will tell you everything you need to know about the element's internal health and its overall safety.
1. The Resistance Test (Is the element working?)
This test checks for a continuous, working filament inside the element. All you have to do is touch one probe to each of the two screw terminals. For this test, it doesn’t matter which probe touches which terminal.
2. The Ground Fault Test (Is the element safe?)
Here, you're checking for any electrical leaks from the element to its metal casing, which would create a serious safety hazard. Touch one probe to a screw terminal and the other probe to the metal body of the tank or the element’s flange.
A multimeter gives you the most accurate diagnosis. While you'll find plenty of technical guides online, many don't account for specific Australian conditions, like how local water quality in Melbourne can affect failure rates. For some more general technical steps, you can explore this detailed guide on element testing.
What About a Continuity Tester?
You might have heard of a simpler tool called a continuity tester. You can think of it as a very basic, stripped-down multimeter. It doesn’t provide a specific number reading in ohms; it just gives you a straight "yes" or "no."
If you connect a continuity tester to a working element, it will beep or light up to show there’s a complete path for electricity. If it stays silent, the path is broken.
While a continuity test is great for spotting a completely dead element (an open circuit), it doesn't give you the full story. A multimeter is more thorough—it can also identify a short circuit (a reading of zero ohms) and provides the exact resistance, which tells you more about the element's condition. For a proper diagnosis, the multimeter is always the better tool.
Alright, let's get down to business. You've done the most important thing first—killed the power—and you've got your multimeter ready. Now it's time to put that theory into practice and figure out what's really going on inside your hot water system.
Think of this as being guided by a pro, looking over your shoulder. We'll walk through it step-by-step, so there's no guesswork. By the time we're done, you'll know for sure whether your element is healthy or if it's the culprit behind your cold showers.
Getting to the Hot Water Element
First things first, we need to actually get to the element. It's tucked away for safety, hidden behind a protective access panel on the side of your tank. Most electric units here in Australia have two of them—an upper and a lower element—and each has its own little door.
Find the Access Panels: Scan the side of your tank for one or two rectangular or round metal plates. They’re usually held in place with just a couple of screws.
Remove the Panel: Grab a screwdriver and take out the screws holding the panel on. You'll probably find a wad of insulation behind it. Just gently pull that out of the way to get a clear view of the element's head and its wiring.
Take a Photo: Stop. Before you touch a single wire, pull out your phone and take a clear picture of how everything is connected. This is your get-out-of-jail-free card. It's a perfect map for when you need to put it all back together, removing any "wait, how did this go?" moments later.
With your photo safely stored, you can now disconnect the wires. Use a screwdriver or a nut driver to carefully loosen the terminal screws and slip the wires off. Just make sure they're moved aside so they can't touch anything by accident.
The Resistance Test: Is the Element Alive?
This is the main event. The resistance test is what tells us if the element's internal filament—the part that actually does the heating—is still in one piece. We're looking for a specific number that says the electrical circuit is complete and ready to heat water.
The infographic below is a great visual reminder for any time you're using a multimeter. It's always the same simple process.
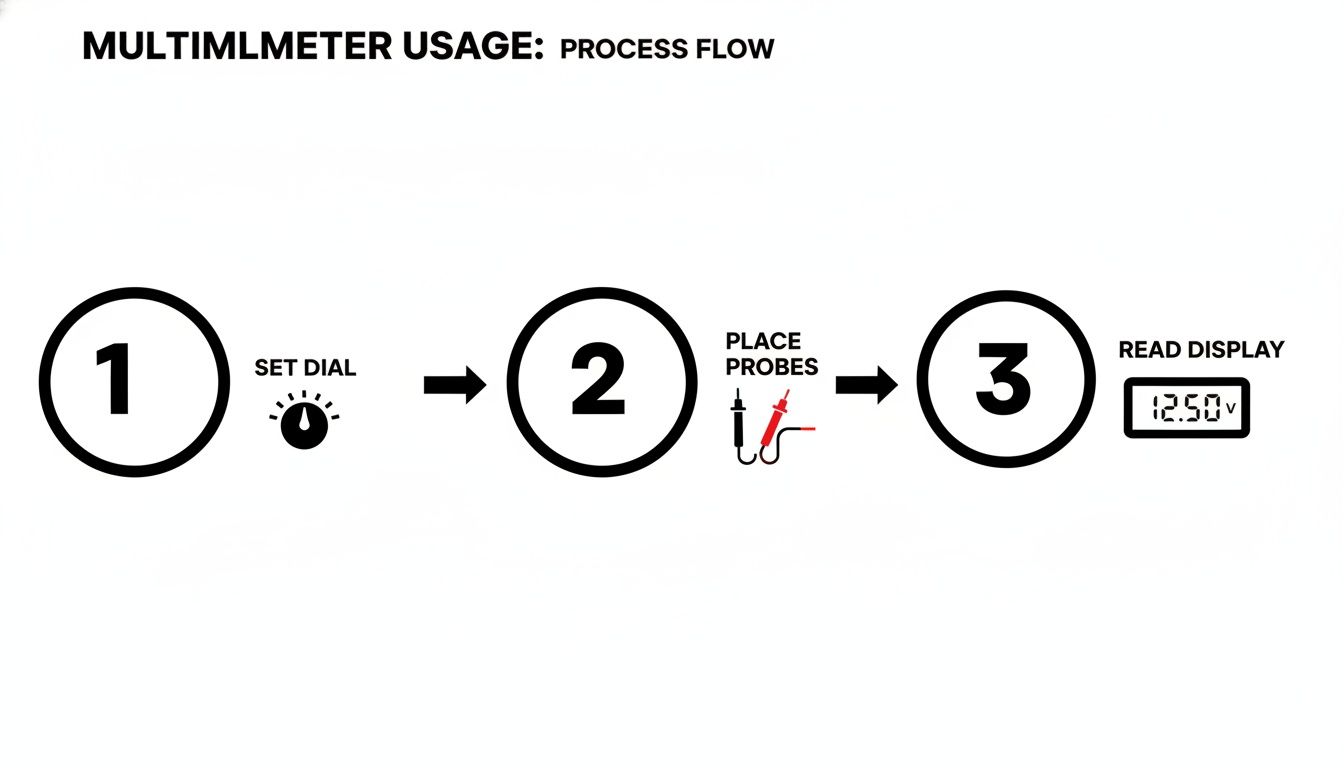
This simple loop—set the tool, make contact, read the result—is the key to getting confident and accurate readings every time.
Now, let's do it on the element:
- Set your multimeter dial to the 200 ohms (Ω) setting.
- Press one of your multimeter probes firmly against one of the element’s screw terminals.
- Press the other probe against the second screw terminal.
- Keep the probes steady and look at the reading on the display.
What that screen tells you is everything. A good, working element will show a resistance reading somewhere between 10 and 30 ohms. If you see a number in that ballpark, it means the internal filament is intact. The element itself is probably fine.
But, if the screen reads "OL" (Open Loop), "1", or shows an infinity symbol (∞), the element is dead. The circuit is broken, the filament has snapped, and it can't heat water anymore. It needs replacing. A reading of zero ohms is also a bad sign—that's a short circuit, another critical failure that means the element is toast.
The Ground Fault Test: Is the Element Safe?
You're not done yet. After checking for resistance, there's a second, equally critical safety check to perform: the ground fault test. This test makes sure there isn't any electricity "leaking" from the heating filament to the metal casing of the element. This is a very dangerous situation called a ground fault.
A ground fault is what causes your safety switch (RCD) to trip. In a worst-case scenario, it could even energise the water in your tank.
Here's how to run this vital check:
- Leave your multimeter on the ohms (Ω) setting.
- Place one probe firmly on one of the element's screw terminals (just like before).
- Touch the other probe to a clean, bare metal spot on the hot water tank. The hexagonal base of the element itself or a nearby screw head is perfect.
What You Want to See: For a safe element, you should see no continuity. Your multimeter should read "OL," "1," or the infinity symbol. It's the same reading you'd get for a broken element in the last test, but here, it's a good thing!
If the multimeter beeps or shows any kind of numerical reading, it means electricity is leaking to the tank. This is a major safety hazard. The element has failed dangerously and must be replaced immediately. Don't even think about using the hot water system until it's fixed.
To be absolutely sure, repeat the test for the other screw terminal. Touch one probe to the second terminal and the other to the tank, again looking for that "OL" reading.
By running both the resistance and ground fault tests, you've built a complete picture. You now know for certain if your element is working properly and, most importantly, if it's safe.
Interpreting the Results: What Do the Numbers Mean?
You’ve done the tests, and your multimeter is showing a number. So, what does it all mean? Think of that reading as the element telling you its life story—a quick, honest assessment of its health. Let's translate those electrical figures into plain English so you know exactly what’s going on inside your hot water tank.
These numbers take all the guesswork out of the diagnosis. They give you a direct link between the symptoms you’re seeing—like cold showers or a tripping safety switch—and the root cause. Getting your head around these results is the final piece of the puzzle.
The "Good" Reading: A Healthy Element
When you test the resistance across the two screw terminals, you're looking for a reading somewhere between 10 and 30 ohms (Ω).
If your multimeter lands in this sweet spot, you can breathe a sigh of relief. It’s good news. This tells you the internal filament is intact and doing its job of turning electricity into heat, just as it was designed to. Your element isn't the problem here.
In this case, you’ll need to look elsewhere for the culprit. The thermostat is the next logical component to check, or you might have an issue with the main power supply to the unit itself.
The "Bad" Reading: A Failed Element
There are two classic readings that scream "failed element." Both confirm it's time for a replacement, but they tell slightly different stories about how it gave up the ghost.
Open Loop (OL or Infinity): If your multimeter shows "OL," "1," or an infinity symbol (∞), it means the circuit inside the element is broken. The filament has snapped. Electricity has nowhere to go, so no heat is made. This is easily the most common way an element fails and is the classic cause of having no hot water whatsoever.
Zero Ohms (Short Circuit): A reading of zero, or something very close to it, points to a short circuit. This is a different kind of failure where the filament has broken and made contact with itself, creating an easy, uncontrolled path for electricity. This will often trip your circuit breaker instantly. It's a critical failure, and the element needs to be replaced immediately.
Your ground fault test is a non-negotiable safety check. A reading of "OL" here is what you want to see—it confirms the element is safely isolated from the tank's casing. If you get any numerical reading or a continuity beep, stop. This indicates a dangerous ground fault, a serious safety hazard that needs immediate attention.
Diagnosing Your Hot Water Problem
Let's put it all together. This table connects the dots between the symptoms you're experiencing, the multimeter readings you're likely to see, and the final diagnosis.
| Symptom | Likely Test Result | Probable Cause |
|---|---|---|
| No hot water at all | "OL" (Open Loop) or 0 Ohms | A completely failed element (either open or shorted). |
| Lukewarm water only | One element tests good (10-30 Ω), the other tests "OL." | One of the two heating elements has failed, leaving the other to do all the work. |
| Circuit breaker keeps tripping | Zero Ohms or a reading on the ground fault test. | The element has a short circuit or a dangerous ground fault. |
| Hot water but it runs out fast | Lower element tests "OL." Upper element tests good. | The lower element, which heats the bulk of the tank, has failed. |
A clear test result gives you a clear path forward. If you’ve confirmed a failed element, the next step is getting it replaced. To get an idea of the parts involved, you can check out products like the Crown 1.5 kW Hot Water Element to see what you’re dealing with. Now you have the right information to decide whether to tackle the job yourself or call in a pro.
When to Put Down the Tools and Call a Professional
There’s a real sense of achievement in a successful DIY project, especially when you’re learning how to test a hot water element. But every good DIY-er knows their limits, and there are definite moments when it’s time to step back, put down the multimeter, and bring in a licensed professional.
Knowing when to make that call isn’t just about safety—it’s about saving yourself from turning a small problem into a much bigger, more expensive headache.
One of the clearest signals is simply that gut feeling of uncertainty. If you find yourself staring at a tangle of wires, second-guessing your multimeter readings, or just feeling out of your depth, that’s your cue. There’s no shame in it; calling for expert help is often the smartest and safest move you can make.
When Test Results Point to a Bigger Issue
Sometimes, even getting the test right leads you to a point where a professional is the next logical step. Let’s say your multimeter gives you a definitive “OL” reading, confirming the element has burned out. Great diagnosis. But are you truly comfortable and equipped to drain a heavy tank of water and replace the part yourself? If there’s any hesitation, it’s time to call for backup.
The most confusing situation, though, is when the element tests perfectly fine—showing a healthy resistance between 10 and 30 ohms and no ground fault—but you still have no hot water.
This is where things get complicated. A working element with no hot water almost always means the problem lies elsewhere in the system. The culprit is likely the thermostat, the high-limit switch, or even the electrical supply to the unit itself.
These components are far more delicate and carry a much higher risk if you get something wrong. A professional can pinpoint these secondary issues in minutes, safely and accurately. You should also be on the lookout for other critical signs of water heater failure, like leaks or rusty-looking water, which are immediate red flags for an expert call-out.
Why a Professional Call-Out Saves Time and Money
It might feel cheaper to push on with a DIY repair, but a wrong move can cause a cascade of expensive problems. An incorrectly installed thermostat can fry a brand-new element instantly, or worse, create a serious safety risk. For more involved diagnostics, like testing a hot water pressure relief valve, a professional’s experience is non-negotiable.
At the end of the day, calling a licensed technician here in Melbourne gets the job done right the first time. It gives you complete peace of mind, knowing your hot water system is working perfectly and, most importantly, safely.
A Few Common Questions About Hot Water Elements
So, you’ve run the tests and have a better idea of what’s going on inside your hot water tank. It’s totally normal for a few more questions to pop up once you start digging in. Let’s tackle some of the most common ones we hear from homeowners.
What Causes a Hot Water Element to Fail?
More often than not, the biggest enemy of a heating element is sediment buildup. Over the years, minerals like calcium and magnesium—especially common in areas with hard water—can settle and form a crusty layer at the bottom of your tank.
This scale can completely bury the lower element. When that happens, it has to work much harder to heat the water, causing it to overheat and eventually burn out. Another common reason is simply old age. After years of expanding and contracting through countless heating cycles, an element will just wear out.
My Element Tested Good, So What Else Is Wrong?
This is a classic head-scratcher. You’ve put your multimeter on the element, and it’s showing a perfectly healthy reading between 10-30 ohms, but your shower is still freezing cold. This is a tell-tale sign that the problem isn’t the element itself, but something else in the chain.
The very next place to look is the thermostat. It’s the thermostat’s job to tell the element when to turn on. If it’s faulty, it might not be sending any power to the element, even though the element is ready to work. Other culprits could be a tripped high-limit switch (a safety feature) or an issue with the power getting to the unit in the first place.
When your tests show a healthy element, it’s usually a signal that the problem is a bit more complex. While testing an element is a fantastic DIY skill, diagnosing thermostats and power supply issues requires a deeper electrical understanding. Nailing these problems often means having access to specific industry data that most homeowners just don’t have. You can get a sense of how the pros tackle these bigger issues by checking out this overview of advanced hot water system testing.
Can I Test a Water Heater Thermostat with a Multimeter?
Absolutely. It’s a similar process to testing an element, but instead of resistance, you’re checking for continuity. After making sure the power is off, you’d test the thermostat to see if the switch inside is opening and closing the circuit correctly as it should.
At Ring Hot Water, we stock the genuine spare parts and have the expert advice you need to get your system sorted. Whether you need a new element, a thermostat, or a professional to take a look, we’ve got you covered right across Melbourne. You can find our full range of parts and services at https://ringhotwater.com.au.
